Menu management
Quick answer - The menu is the main record for what staff, guests, ordering flows, and the AI can offer. Keep categories, products, variants, options, prices, allergens, dietary tags, photos, and availability current. Outdated menus cause wrong tickets, bad guest answers, and avoidable refunds.
Use this guide when - Owners, GMs, head chefs, admins, and anyone responsible for pricing or menu accuracy.
Before you start - Confirm VAT, currency, service charge, and ordering rules in Restaurant settings. Decide who is allowed to change live prices or mark items unavailable.
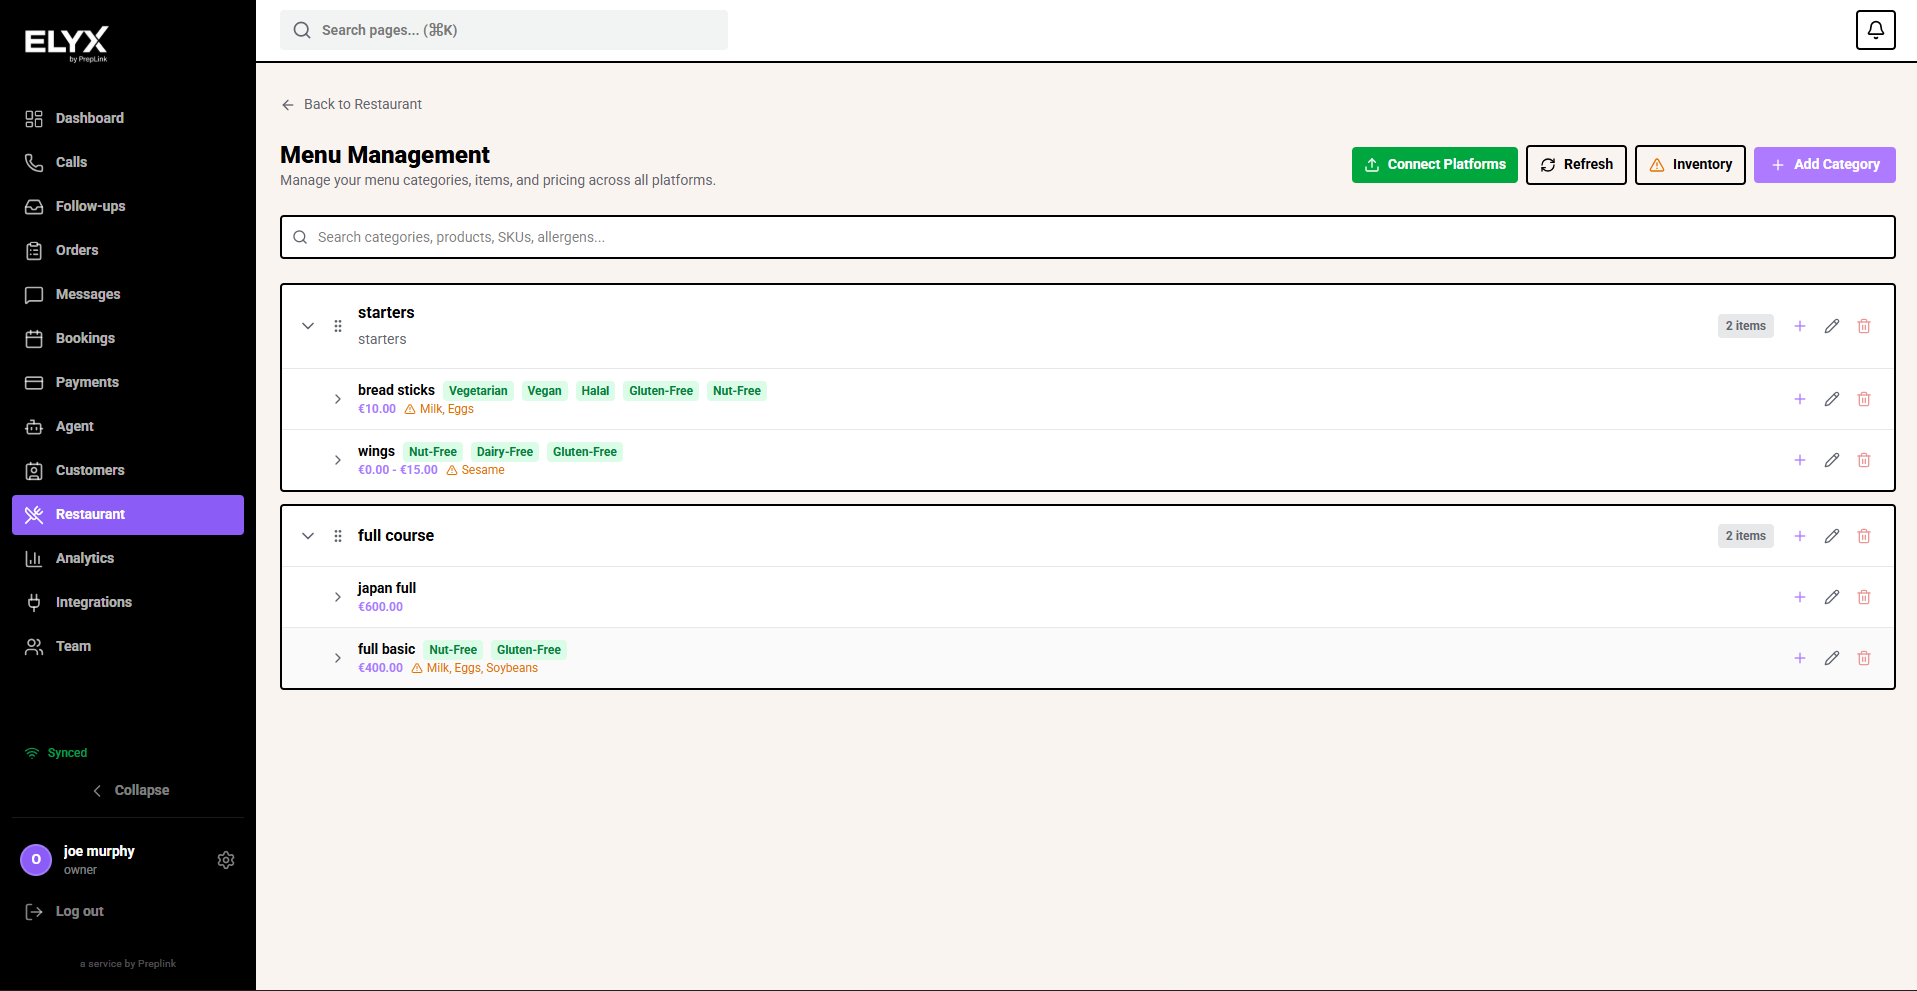
Open Menu Management
- Choose Restaurant from the left menu.
- Choose Menu.
- Search for a category, product, SKU, or allergen when the list is long.
- Use Add Category for a new menu section.
- Use the plus action beside a category to add a product.
- Use Refresh after platform or inventory changes.
Menu structure
Think of the menu in layers:
Category
Product
Variant
Option group
Option
Example:
Category: Pizza
Product: Margherita
Variant: 12 inch
Option group: Extra toppings
Option: Mozzarella
Use variants for sizes or fixed price tiers. Use options for choices, add-ons, modifiers, and kitchen instructions.
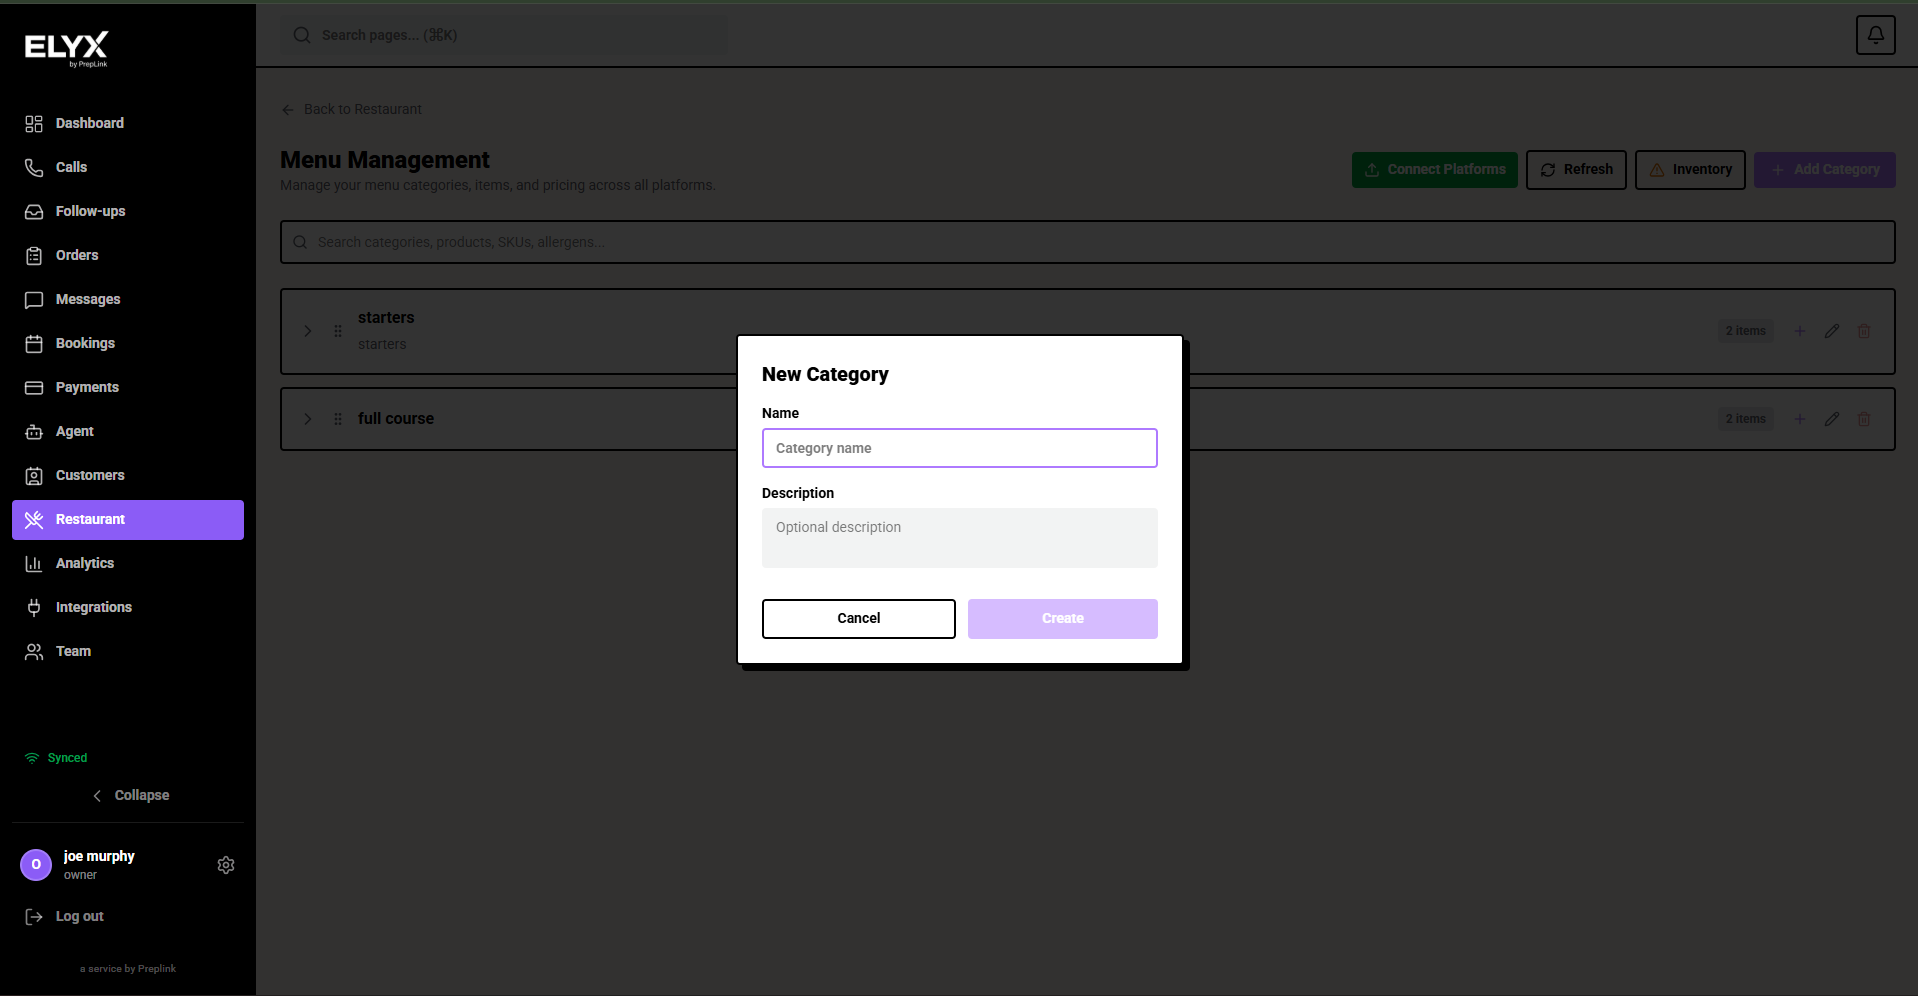
Create a category
- Open Restaurant.
- Choose Menu.
- Choose Add category.
- Enter the category name.
- Add a description if your public menu uses one.
- Set whether the category is active.
- Choose Save.
Common categories include Starters, Mains, Sides, Desserts, Drinks, Lunch, Brunch, and Specials.
Create a product
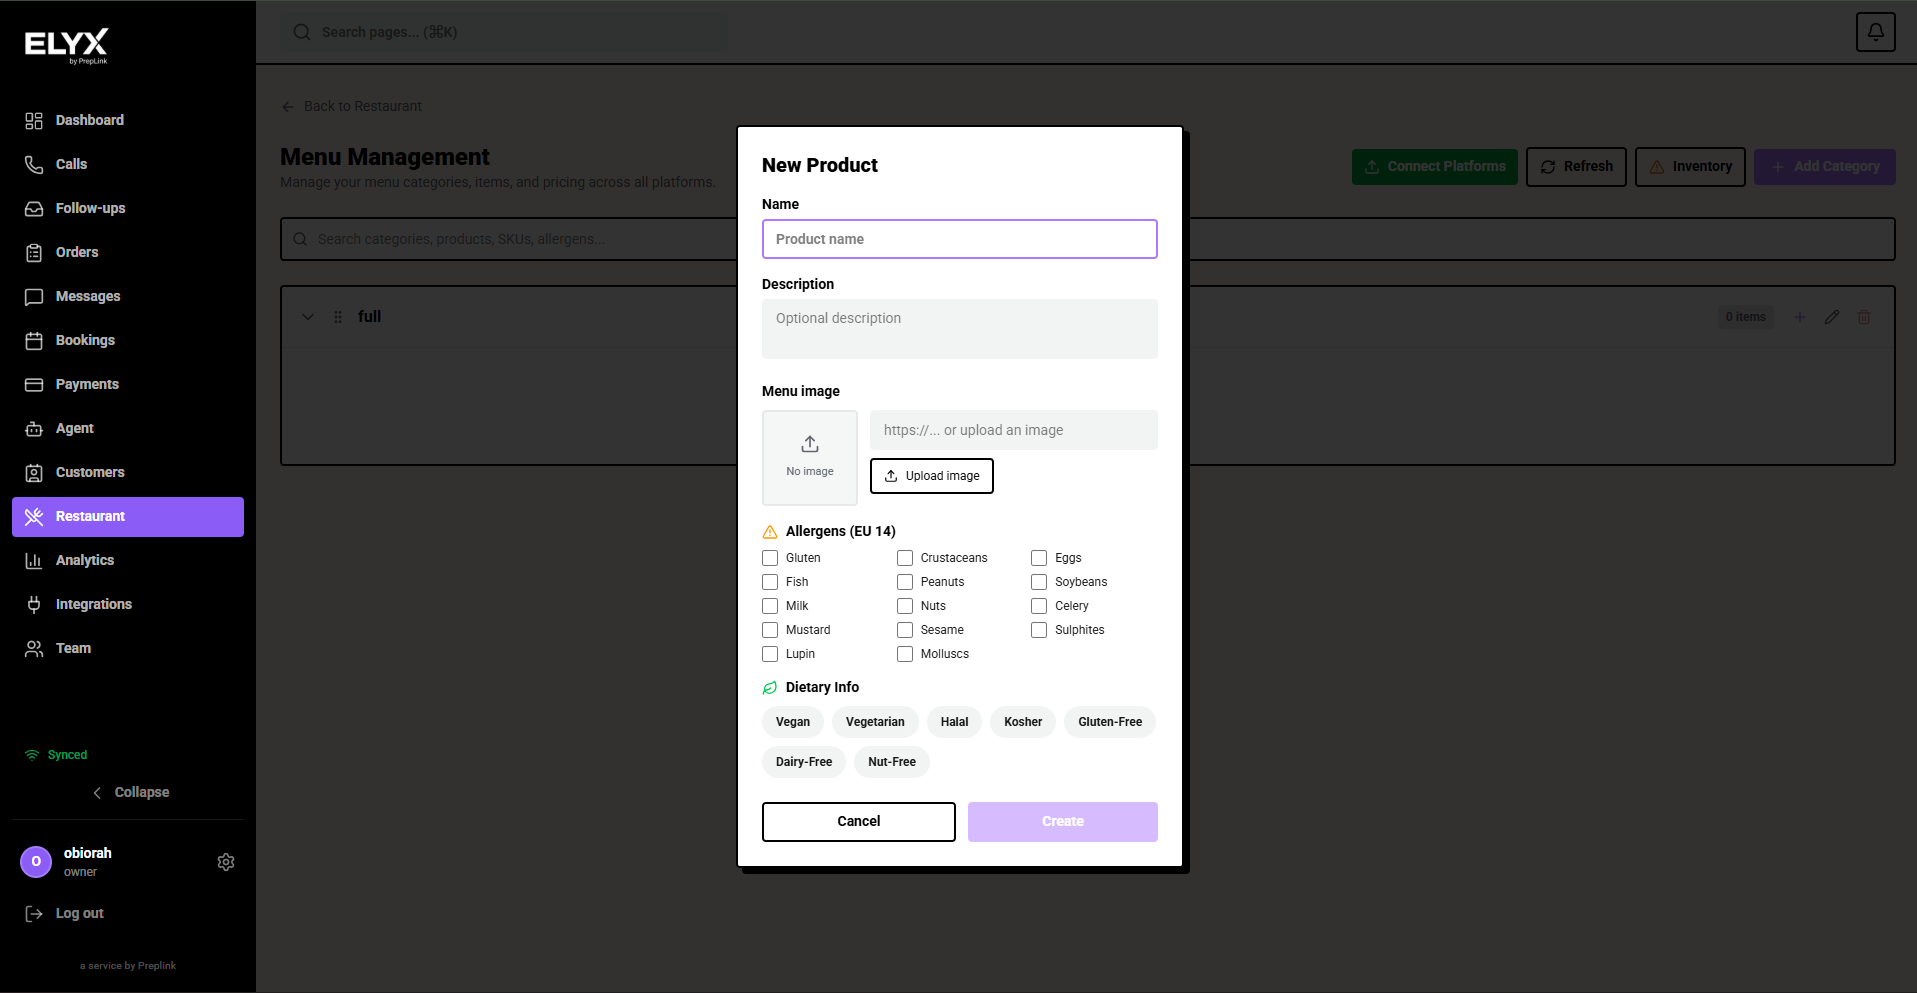
- Open the correct category.
- Choose Add product.
- Enter the product name.
- Add a clear description.
- Set the base price if the item has no variants.
- Add a photo if public ordering or public menus use photos.
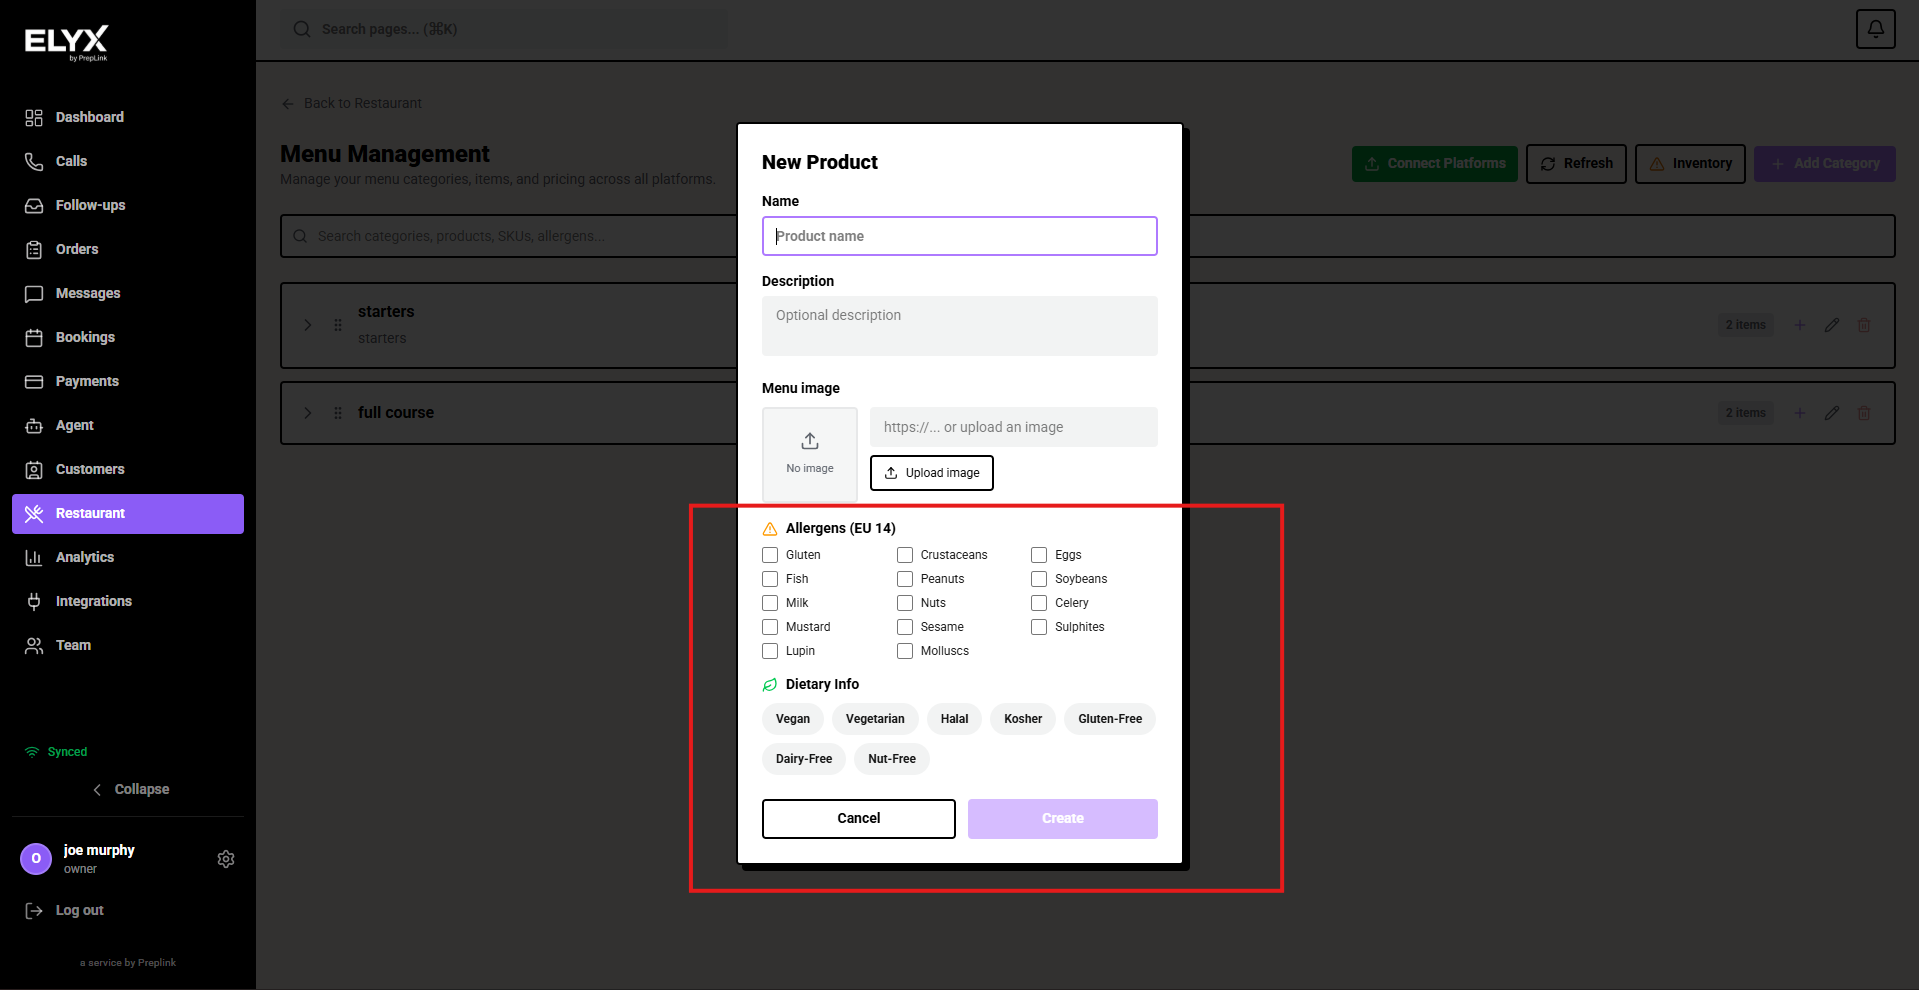
- Add dietary tags such as vegetarian, vegan, gluten-free, or dairy-free where appropriate.
- Add allergens.
- Set the product active or inactive.
- Choose Save.
Descriptions should help both guests and the AI. Instead of House pasta, write what is actually in it.
Add variants
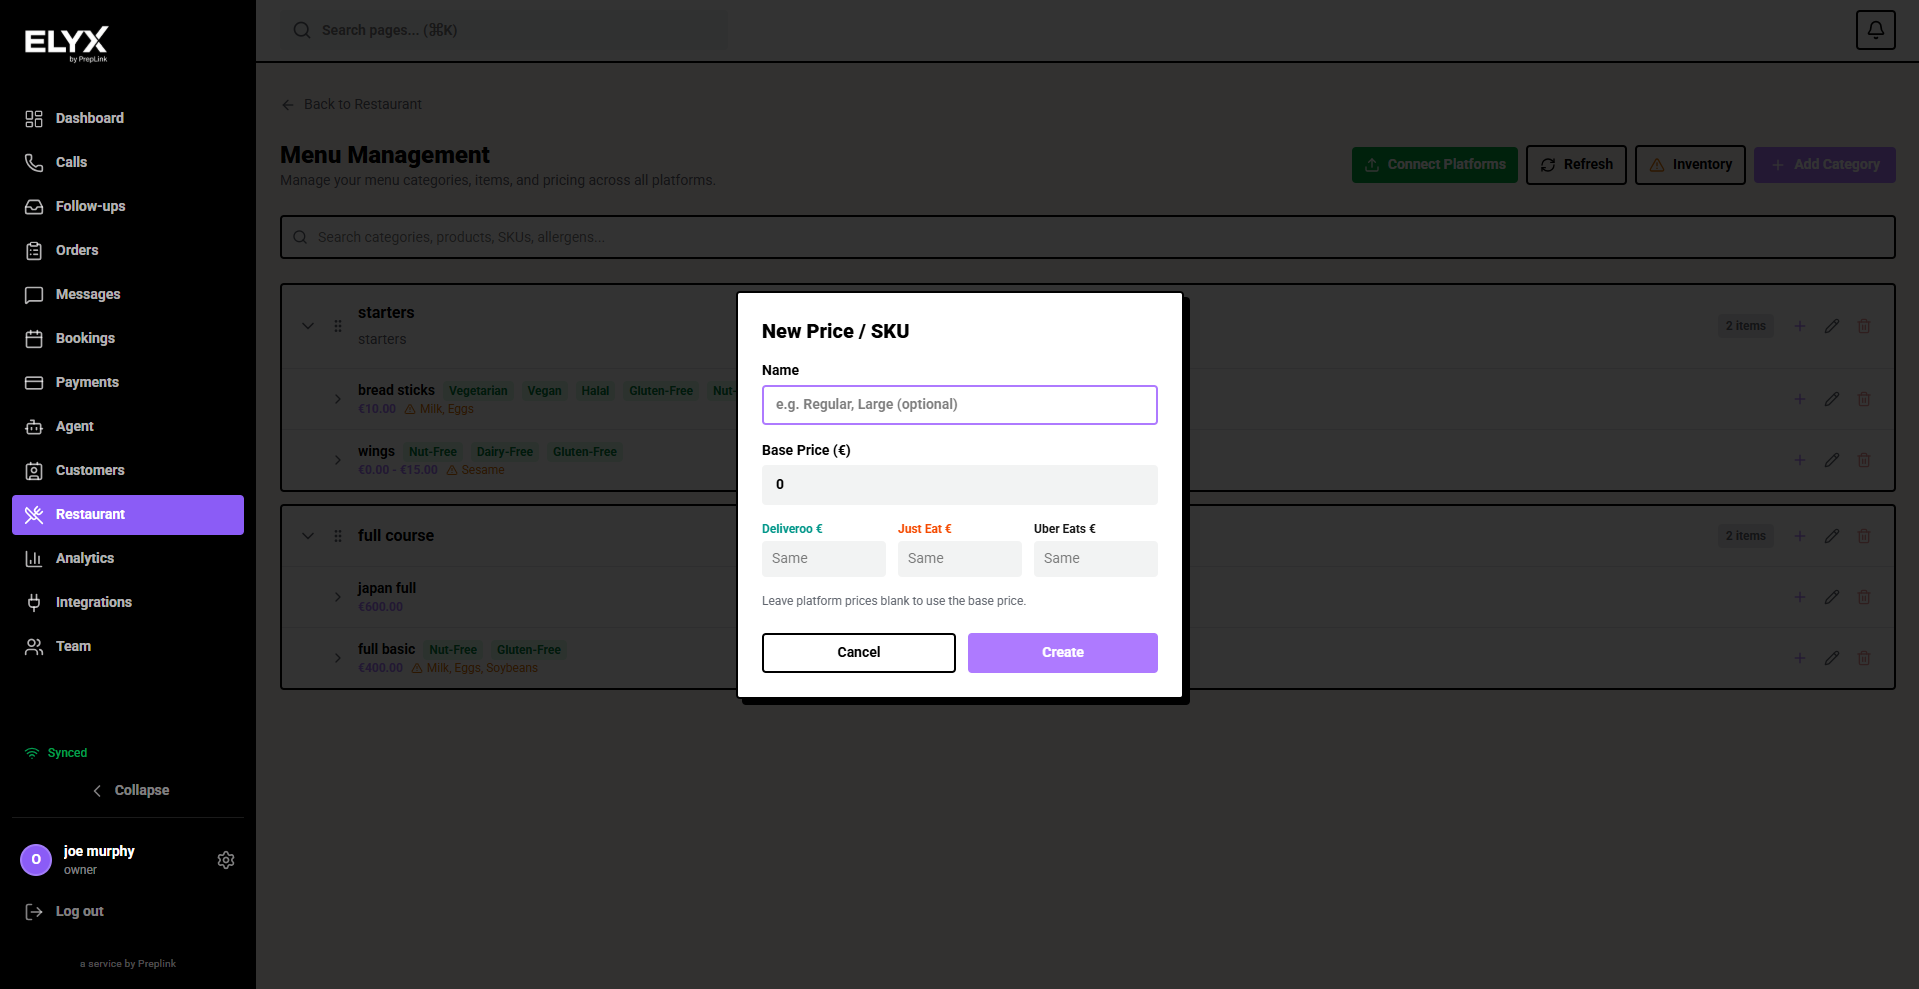
Use variants when the guest chooses one version of the same product.
Examples:
- Small / large.
- 9 inch / 12 inch.
- Glass / bottle.
- Single / double.
- Regular / gluten-free base.
Steps:
- Open the product.
- Find Variants.
- Choose Add variant.
- Enter the variant name.
- Enter the variant price.
- Set availability.
- Choose Save.
If each variant needs different modifiers or allergens, consider separate products instead.
Add option groups
Use option groups when guests or staff need to choose add-ons or modifiers.
Examples:
- Burger temperature.
- Pizza toppings.
- Sauce choice.
- Side choice.
- Remove ingredients.
- Add protein.
Steps:
- Open the product.
- Find Options or Modifiers.
- Choose Add option group.
- Enter the group name.
- Set minimum selections.
- Set maximum selections.
- Add each option and price difference.
- Choose Save.
Example: A Choose your side group might have minimum 1 and maximum 1. A Toppings group might have minimum 0 and maximum 6.
Add allergens and dietary tags
Allergen data is high-risk information. Keep it accurate and avoid overpromising.
- Open the product.
- Find Allergens or Dietary.
- Select the allergens present in the dish.
- Add dietary tags only when the kitchen can honour them.
- Add a note if cross-contamination is possible and your product supports guest-facing notes.
- Choose Save.
Important: If your kitchen cannot guarantee a nut-free, gluten-free, or dairy-free environment, make sure staff and AI wording says that clearly.
Mark an item unavailable
Use unavailable or 86 when an item is temporarily sold out.
- Open Menu.
- Search for the product.
- Open the item.
- Mark it Unavailable, Sold out, or 86 depending on your screen.
- Add a return time if available.
- Choose Save.
Use Inactive for items you are not selling for a longer period. Use 86 for temporary outages.
Review the menu before service
At opening:
- Check specials.
- Check sold-out items.
- Check high-risk allergens.
- Check prices changed since the last printed menu.
- Check delivery platform sync if enabled.
- Confirm the AI should still answer questions about the items listed.
At close:
- Re-enable items that are back tomorrow.
- Remove expired specials.
- Update stock-related availability.
- Record menu issues for the next manager review.
Common mistakes
- Creating duplicate versions of the same item.
- Using options when variants would be clearer.
- Forgetting allergen tags.
- Leaving sold-out specials active.
- Changing prices in Resk but not on printed menus, delivery platforms, or the website.
- Adding vague descriptions that the AI cannot answer from.
- Giving every staff member permission to edit prices.
If something goes wrong - Check Inventory, Orders, and Restaurant AI and core.
Related articles - Kitchen display, Delivery, Public booking page.
Last updated: April 2026