Tables and floor plan
Quick answer - Tables are how Resk understands restaurant capacity. Add each bookable table, group tables into zones, set min/max party sizes, and keep inactive tables out of availability. If tables are wrong, reservations, waitlist, public booking, and AI booking will be wrong.
Use this guide when - Owners, GMs, hosts, floor managers, and anyone responsible for seating guests.
Before you start - Walk the floor and write down each table name, zone, normal capacity, maximum capacity, whether it can join with another table, and whether it should be bookable online.
Open Tables
- Choose Restaurant from the left menu.
- Choose Tables.
- Use List to review table names, capacity, active status, QR codes, and edit/delete actions.
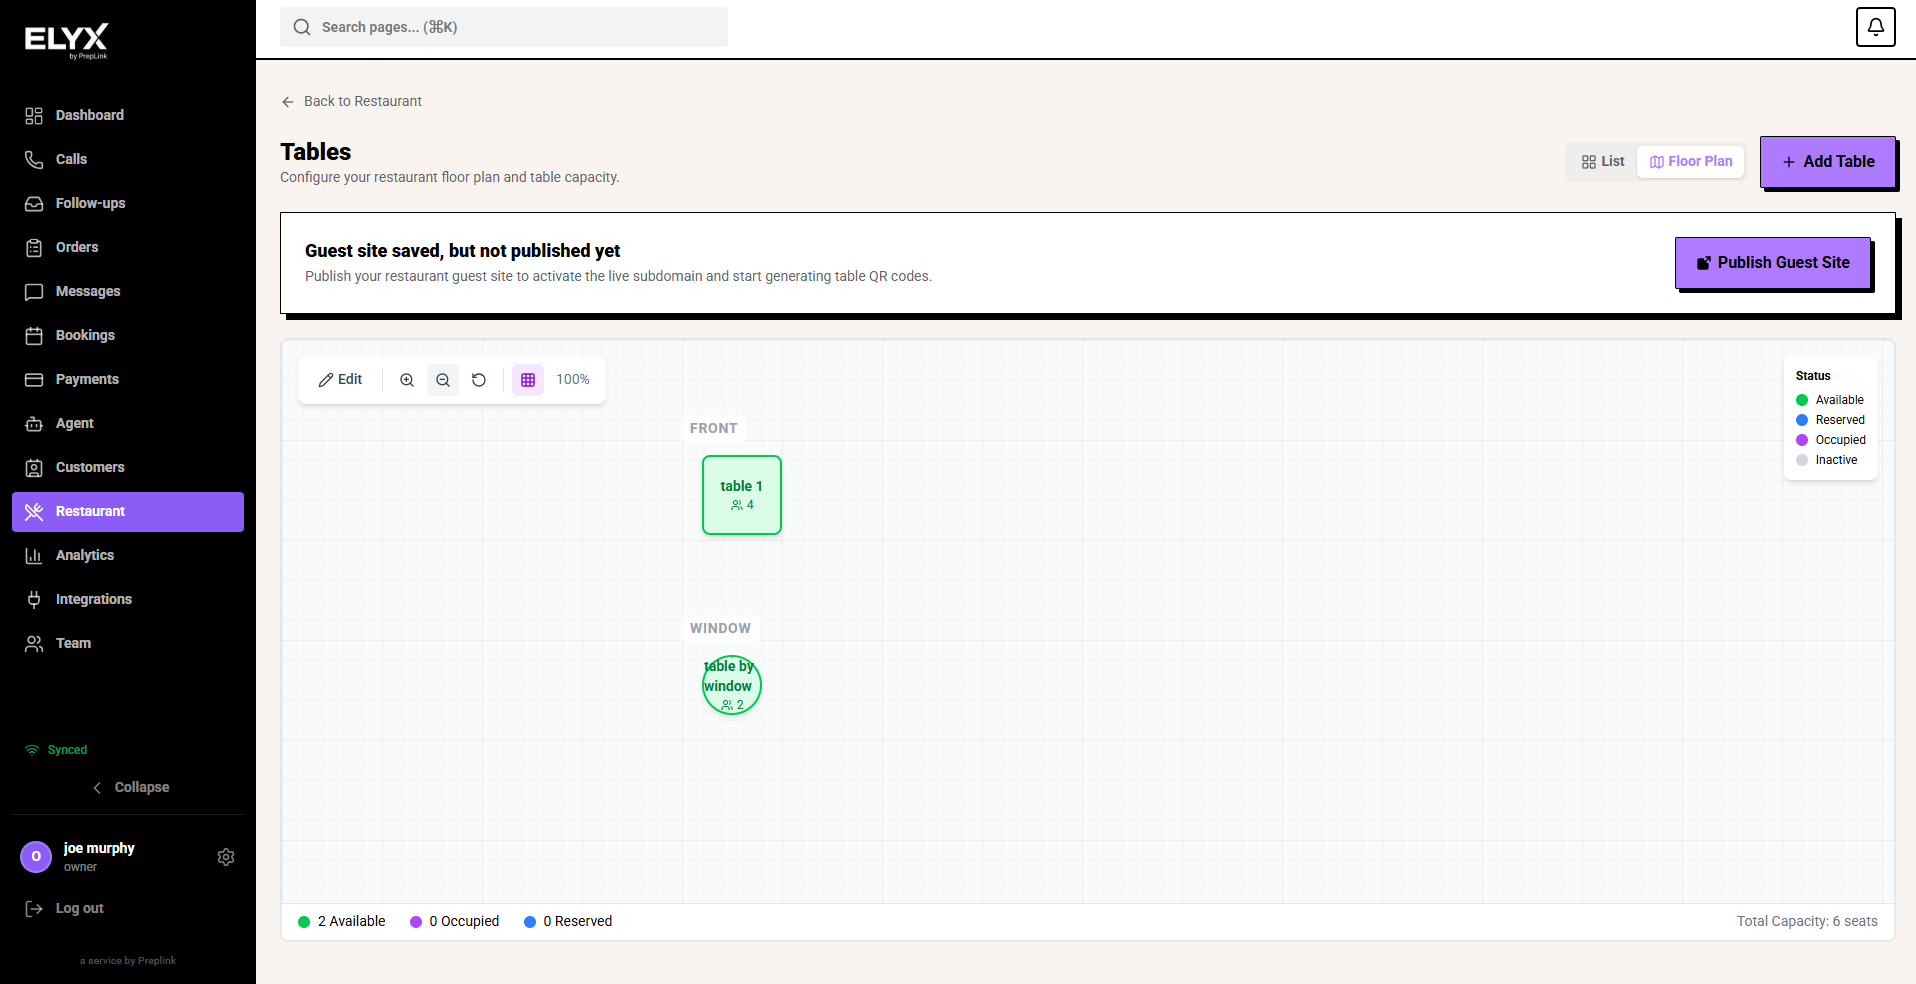
- Use Floor Plan when you want to place tables visually for the host stand.
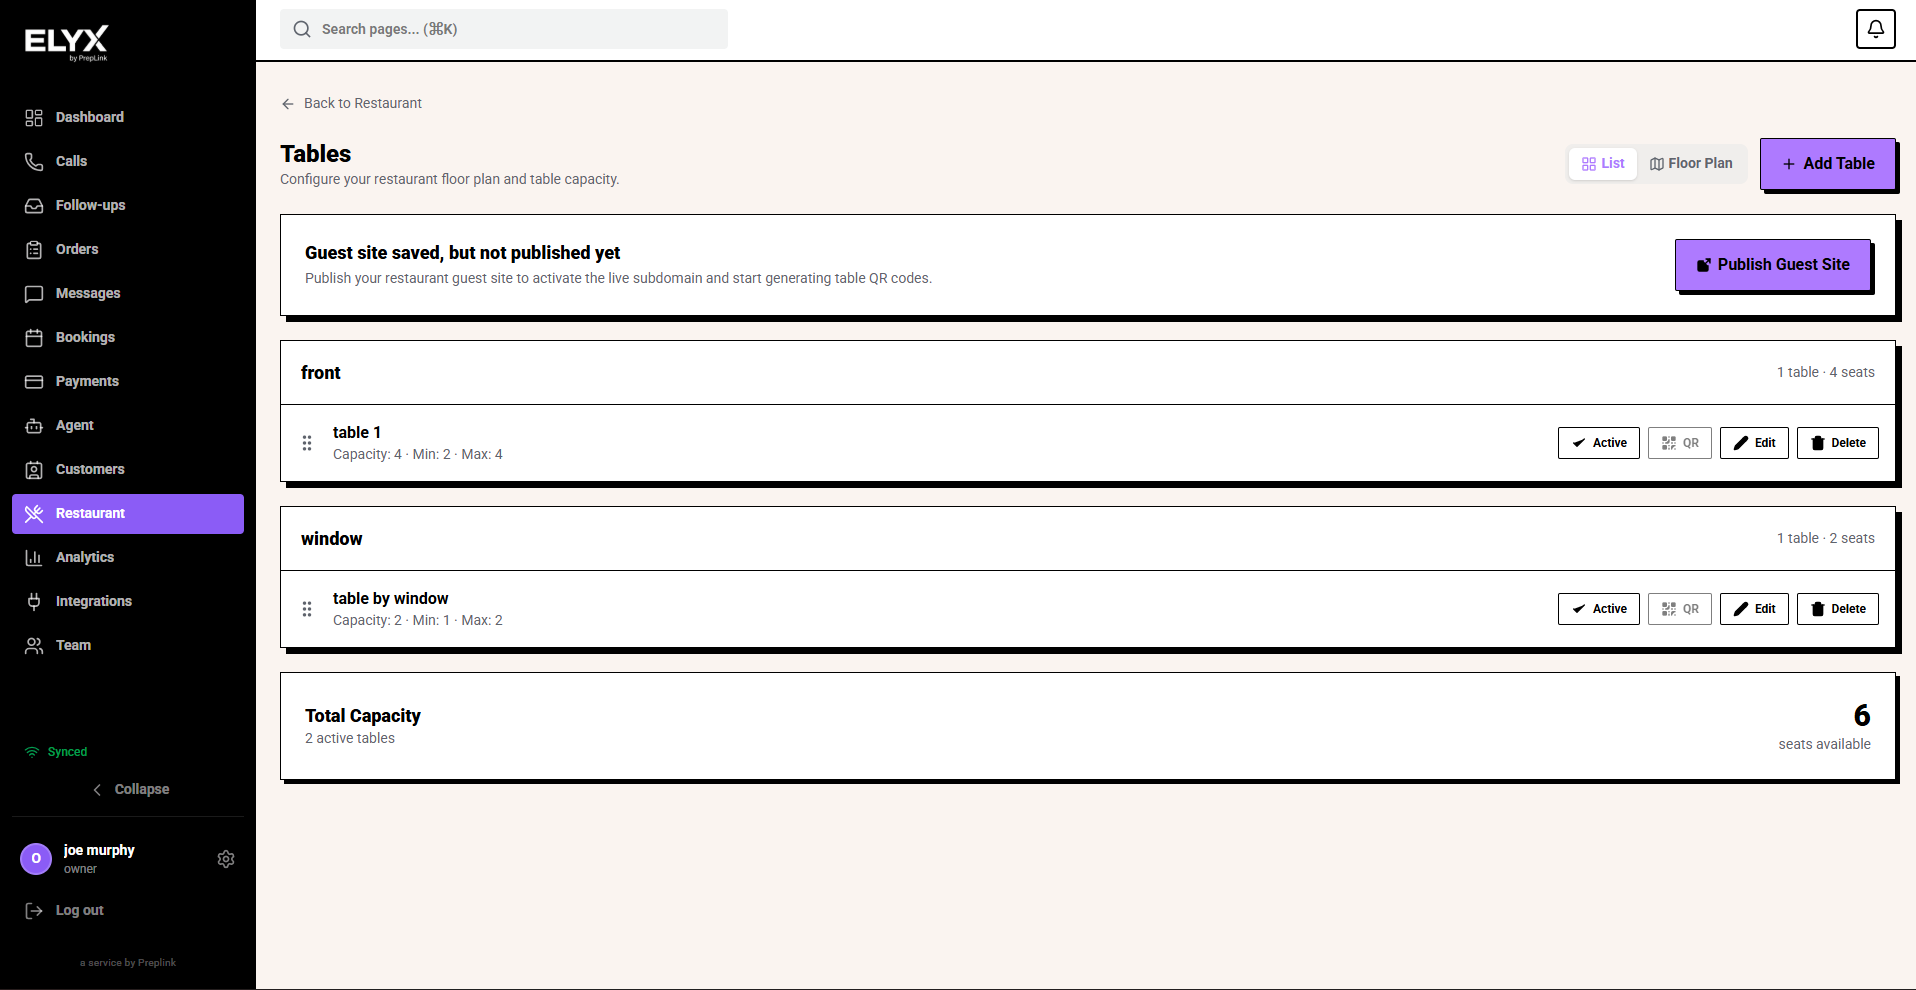
What a table controls
| Field | Why it matters |
|---|---|
| Name or number | Staff need to recognise it instantly during service. |
| Zone | Helps hosts filter by section, patio, bar, private room, or floor. |
| Minimum party size | Stops tiny parties taking large tables if you use that rule. |
| Maximum party size | Stops Resk from offering a table that cannot safely fit the group. |
| Active status | Controls whether the table can be used for availability. |
| Joinable/combinable status | Helps large-party planning where supported. |
| Notes or flags | Useful for accessible seating, high chairs, booths, or outdoor tables. |
Plan your table list
Use names that match the language staff already use.
Good examples:
- T1, T2, T3
- Booth 1, Booth 2
- Patio 4
- Bar 6
- Private Room
Avoid vague names like Table A old, Back one, or Spare, because they confuse new staff and make support harder.
Add a table
- Open Restaurant.
- Choose Tables or Floor plan.
- Choose Add table.
- Enter the table name.
- Choose the zone.
- Set the minimum party size.
- Set the maximum party size.
- Mark the table Active if it should be bookable.
- Add notes or flags if your screen supports them.
- Choose Save.
Repeat until every normal bookable table is in Resk.
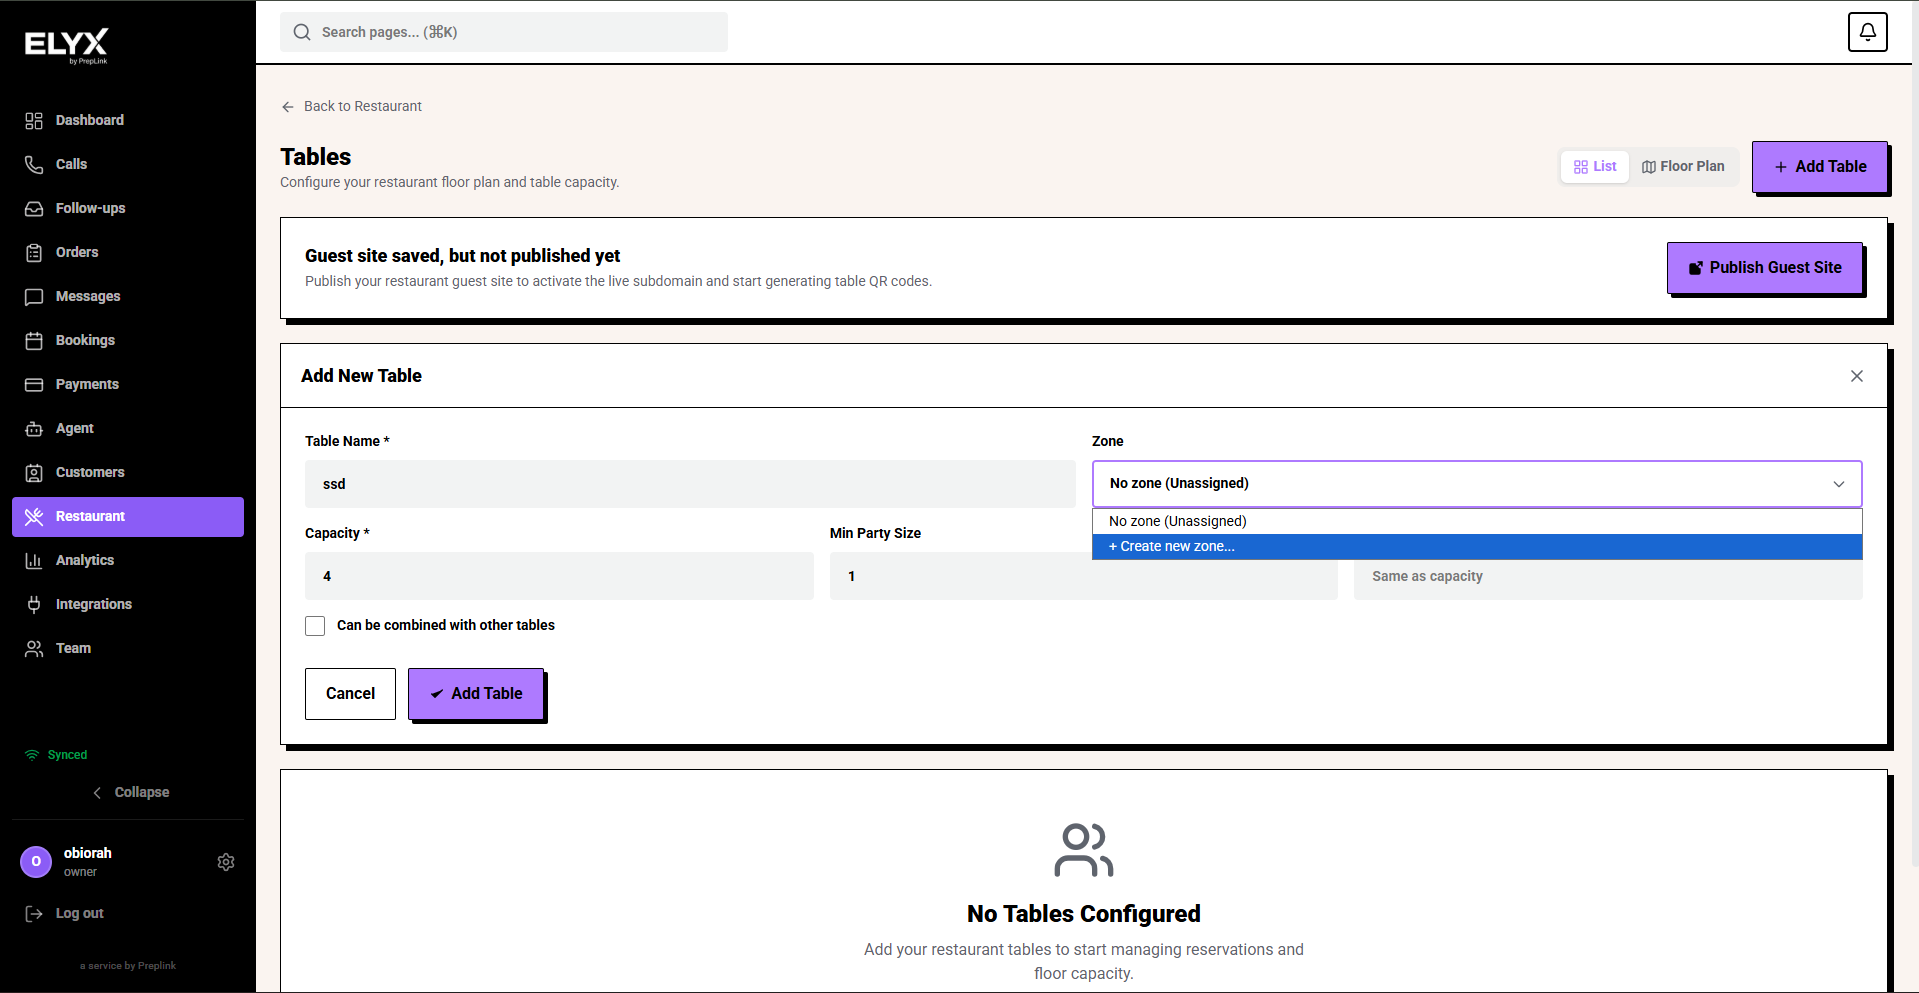
Set up zones
Zones are sections of the restaurant. They make the floor easier to scan and help with reporting.
Common zones:
- Main dining
- Patio
- Bar
- Private room
- Upstairs
- Counter
Keep zone names short. If staff say “patio” during service, call the zone Patio, not External seating terrace.
Set min and max party sizes
Capacity should match real service, not the absolute number of chairs you could squeeze in.
| Table type | Example min | Example max |
|---|---|---|
| Two-top | 1 | 2 |
| Four-top | 2 | 4 |
| Booth | 2 | 5 |
| Large round | 5 | 8 |
| Private room | 8 | 16 |
Note: If you regularly seat two people at a four-top during quiet service but not during peak times, keep the normal capacity honest and manage exceptions manually.
Build or check the floor plan
- Open Floor plan.
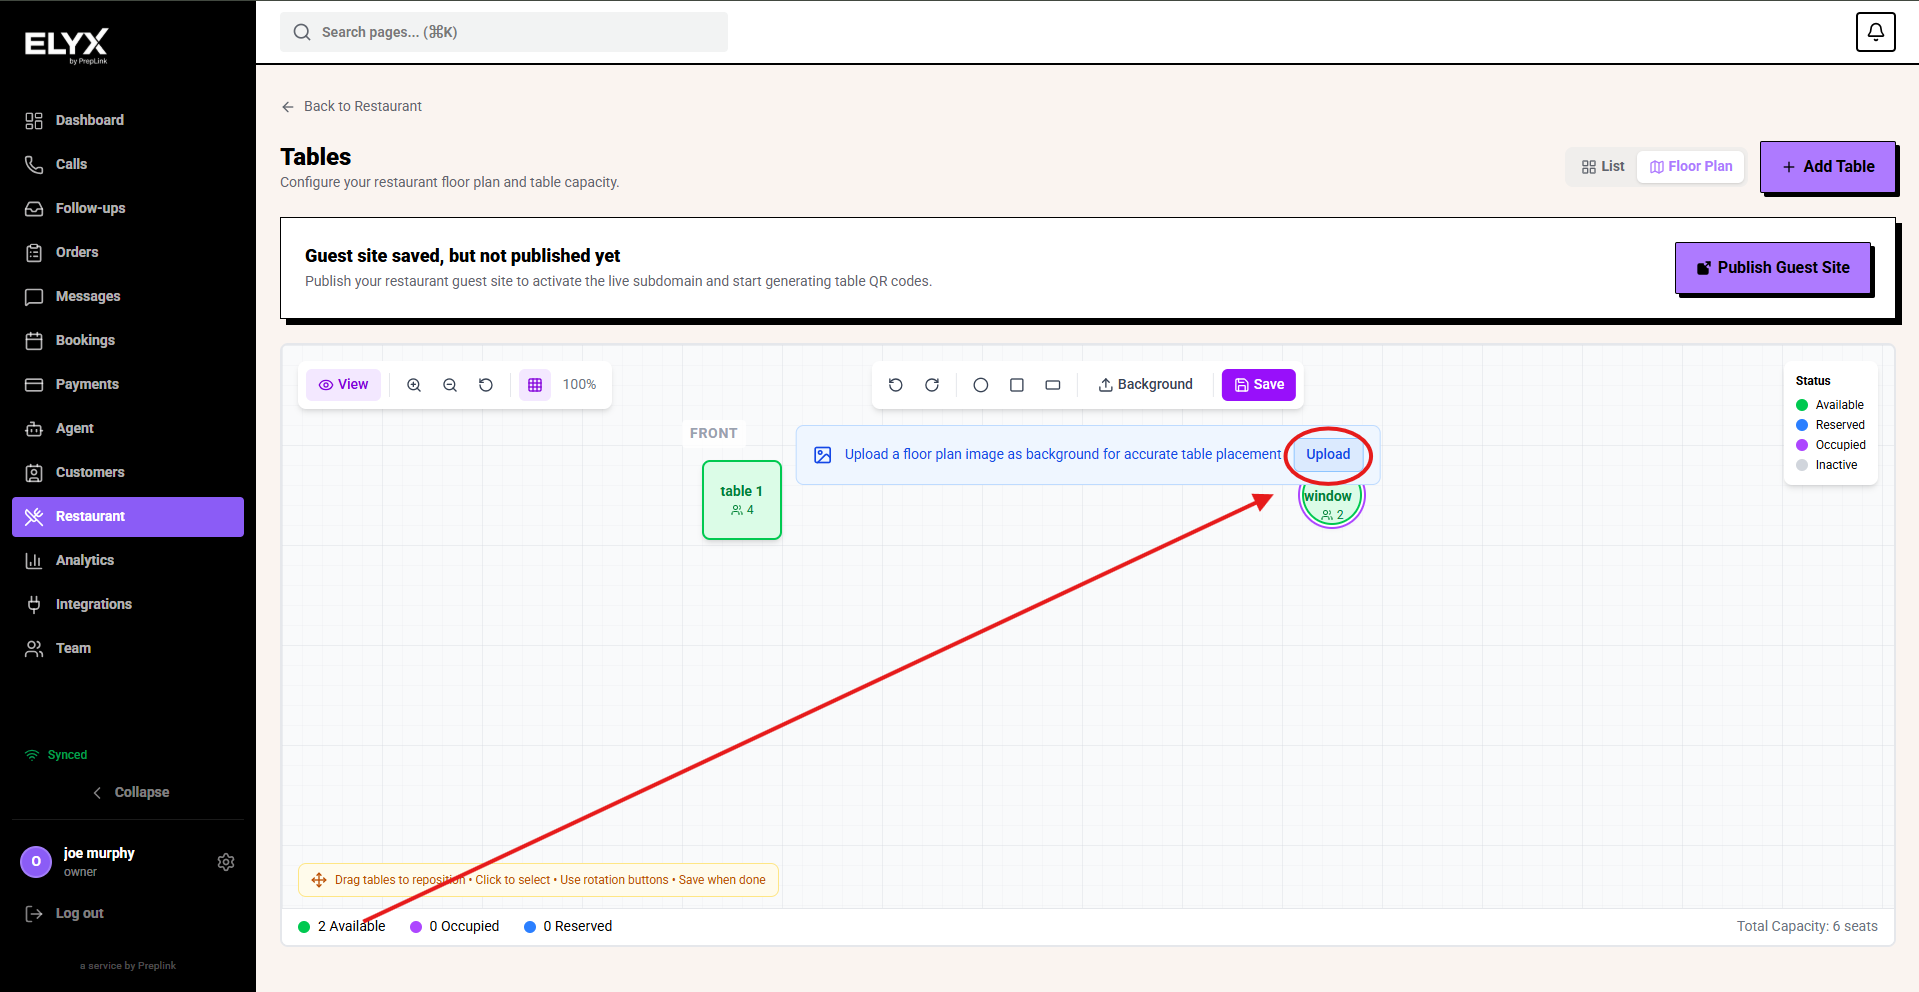
- Place tables roughly where they are in the restaurant.
- Keep enough space between table shapes so staff can tap the right one.
- Group tables by zone.
- Check the view on the device hosts actually use.
- Choose Save.
The floor plan does not need to be architect-perfect. It needs to help staff find the right table quickly.
Use table QR codes
Table QR codes let guests open the right table route for ordering or service where your account supports it.
- Open Tables.
- Find the table.
- Choose the QR action.
- Print or download the code if the screen offers it.
- Test the QR code with a phone before putting it on the table.
- Replace the code if the table route changes.
Handle joined tables
If you join tables for large parties:
- Mark tables as Combinable if Resk supports that field.
- Add notes that explain common combinations, such as T5 + T6 = party of 8.
- For large bookings, assign the reservation to the combined capacity.
- Check that the original tables are not accidentally sold twice.
If the product does not support table combinations, create a clear staff process and use reservation notes.
Temporary table changes
Use temporary changes when the floor changes for a day:
- Mark a table inactive if it is broken, blocked, or used for storage.
- Add a temporary event table only if staff will actually use it.
- Update outdoor tables when weather or season changes affect availability.
- Review private-room tables before events and large bookings.
Test table setup
After setup, test these cases:
- Book a party of two and confirm Resk suggests an appropriate table.
- Book the largest normal party and confirm it fits.
- Fill a table with one reservation and check that the same table is blocked for the right duration.
- Mark a table inactive and confirm it no longer appears for booking.
- Check the floor plan on a tablet or host device.
Common mistakes
- Setting every table minimum to 1 and maximum to 10.
- Leaving old or seasonal tables active.
- Using table names staff do not recognise.
- Forgetting outdoor tables when the season changes.
- Adding combined-table capacity without blocking the individual tables.
- Making the floor plan too detailed to use during service.
If something goes wrong - Check Restaurant settings, Reservations, and Waitlist.
Related articles - Reservations, Waitlist, Public booking page.
Last updated: April 2026