Public booking page
Quick answer - The public booking page lets guests book without calling. It uses your restaurant settings, table capacity, service periods, and reservation rules. Test it on mobile before sharing the link on your website, Google profile, social channels, or campaigns.
Use this guide when - Owners, GMs, marketing teams, web teams, and support staff.
Before you start - Complete Restaurant settings, Tables, and Reservations. Do not publish the public booking link until test bookings behave correctly.
Open public page settings
- Choose Restaurant from the left menu.
- Choose Public page, Public booking, or Booking page.
- Review the website editor sections.
- Check Restaurant story, Design, SEO and sharing, Routes and checkout, Menu showcase, and Visit and contact.
- Use Save changes while you are still editing.
- Choose Publish only after the page, routes, and booking rules are ready.
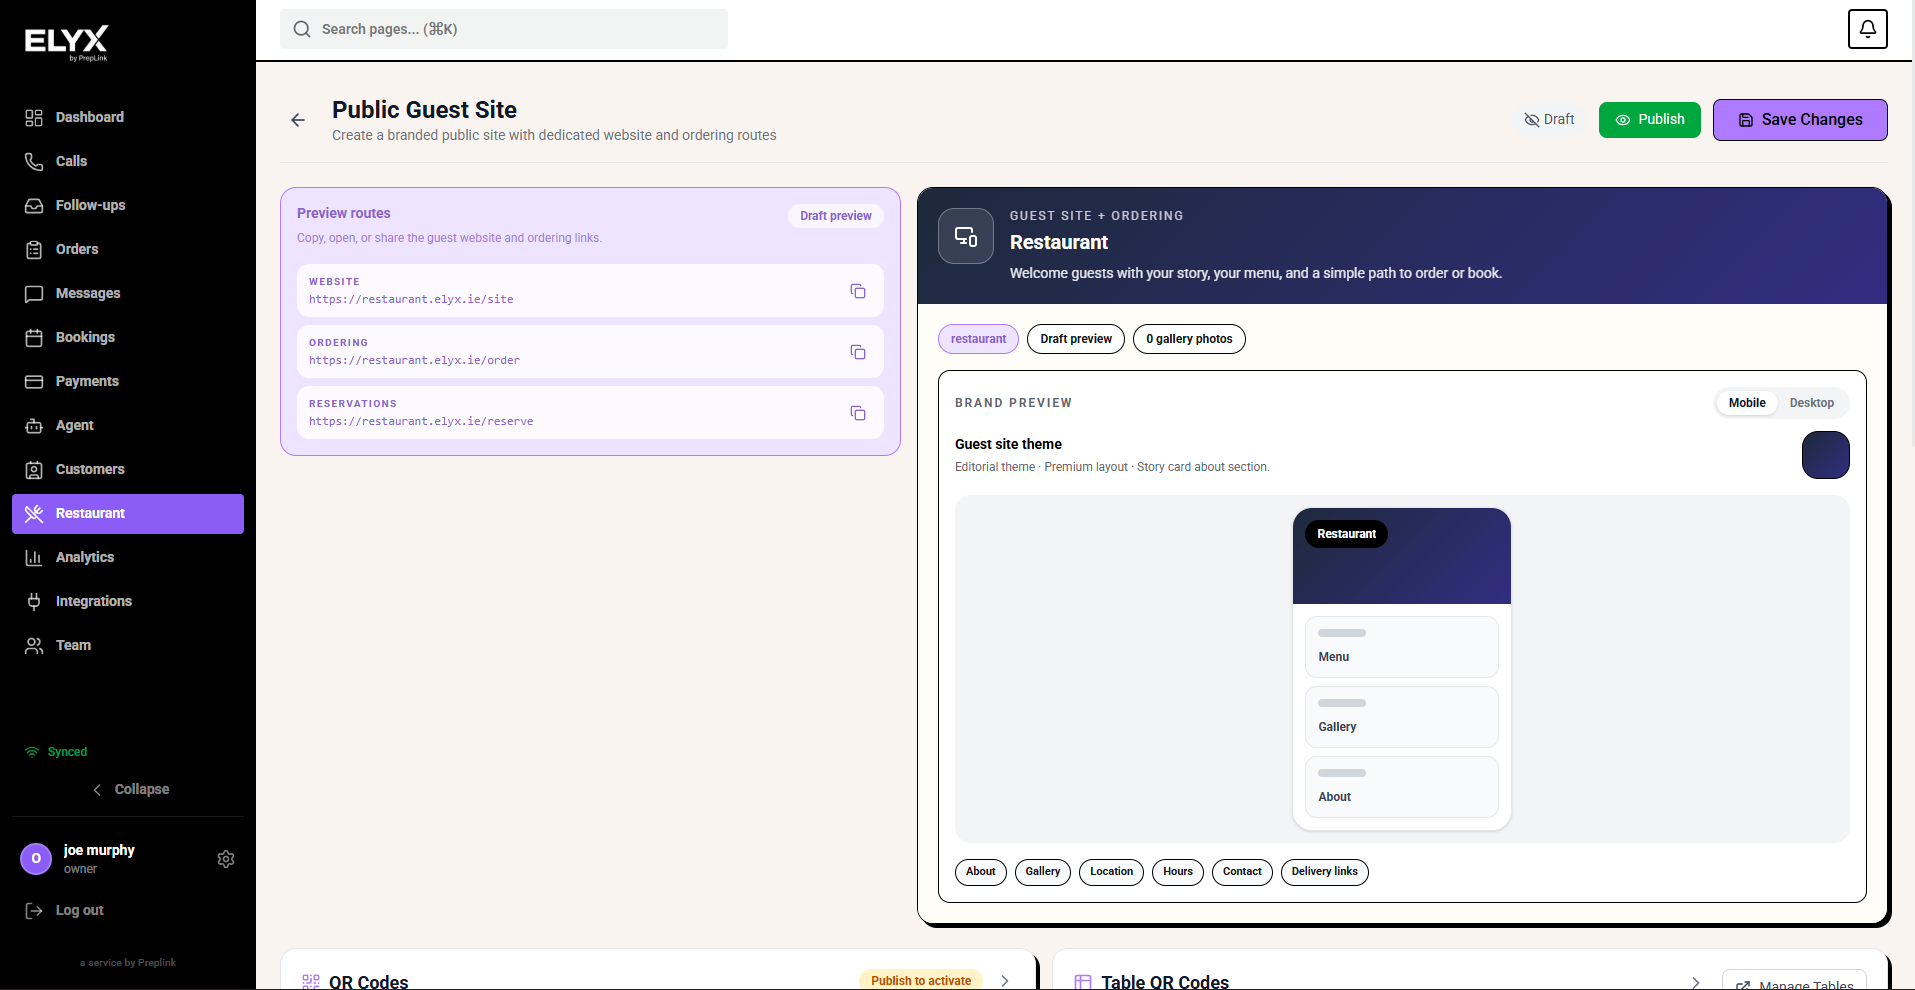
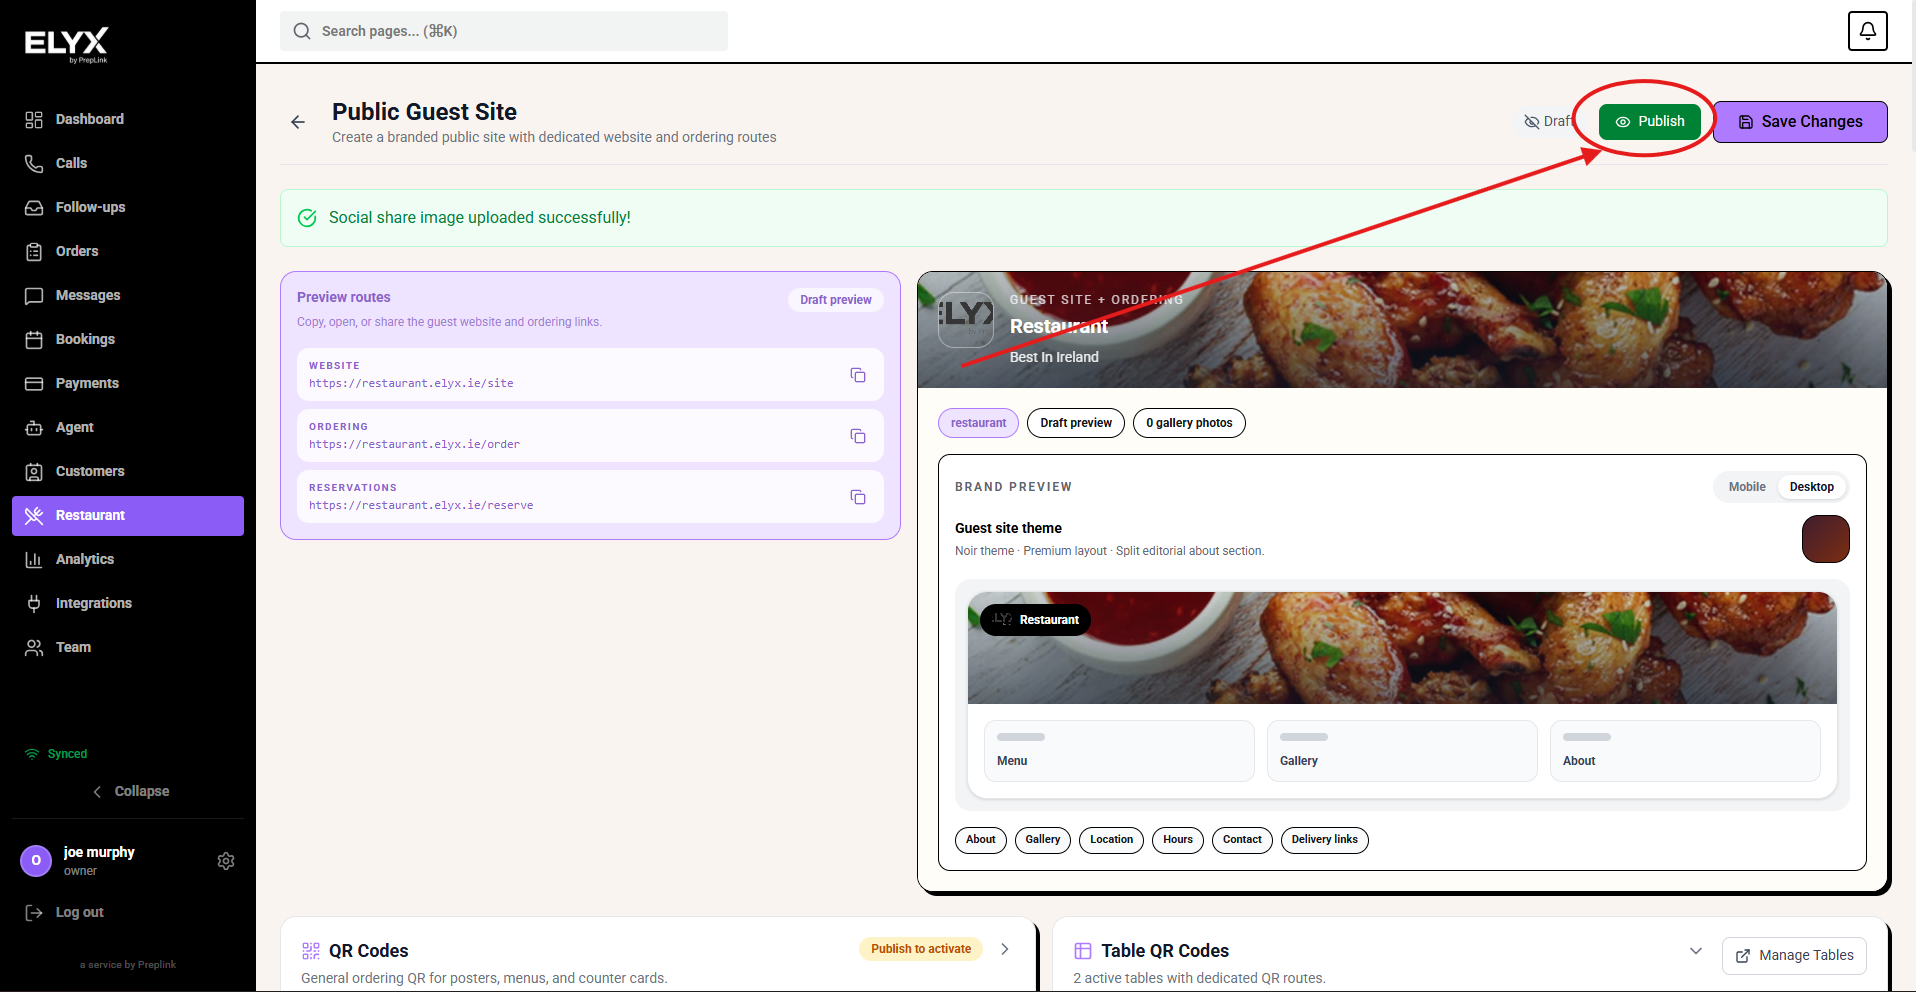
The public page screen is the restaurant website editor. The preview on the right shows how guests will see the branded site. The route cards on the left show the website, ordering, and reservation links that staff can copy once the page is ready.
What guests can do
Depending on your setup, guests may be able to:
- Choose party size.
- Choose date and time.
- Add name, phone, and email.
- Add notes such as allergy, high chair, or occasion.
- Confirm a booking.
- Pay a deposit or prepayment where enabled.
- Receive SMS or email confirmation.
- Change or cancel through a link where enabled.
The public page should match your actual restaurant rules.
Restaurant story
- Open Restaurant.
- Choose Public page.
- Open Restaurant story.
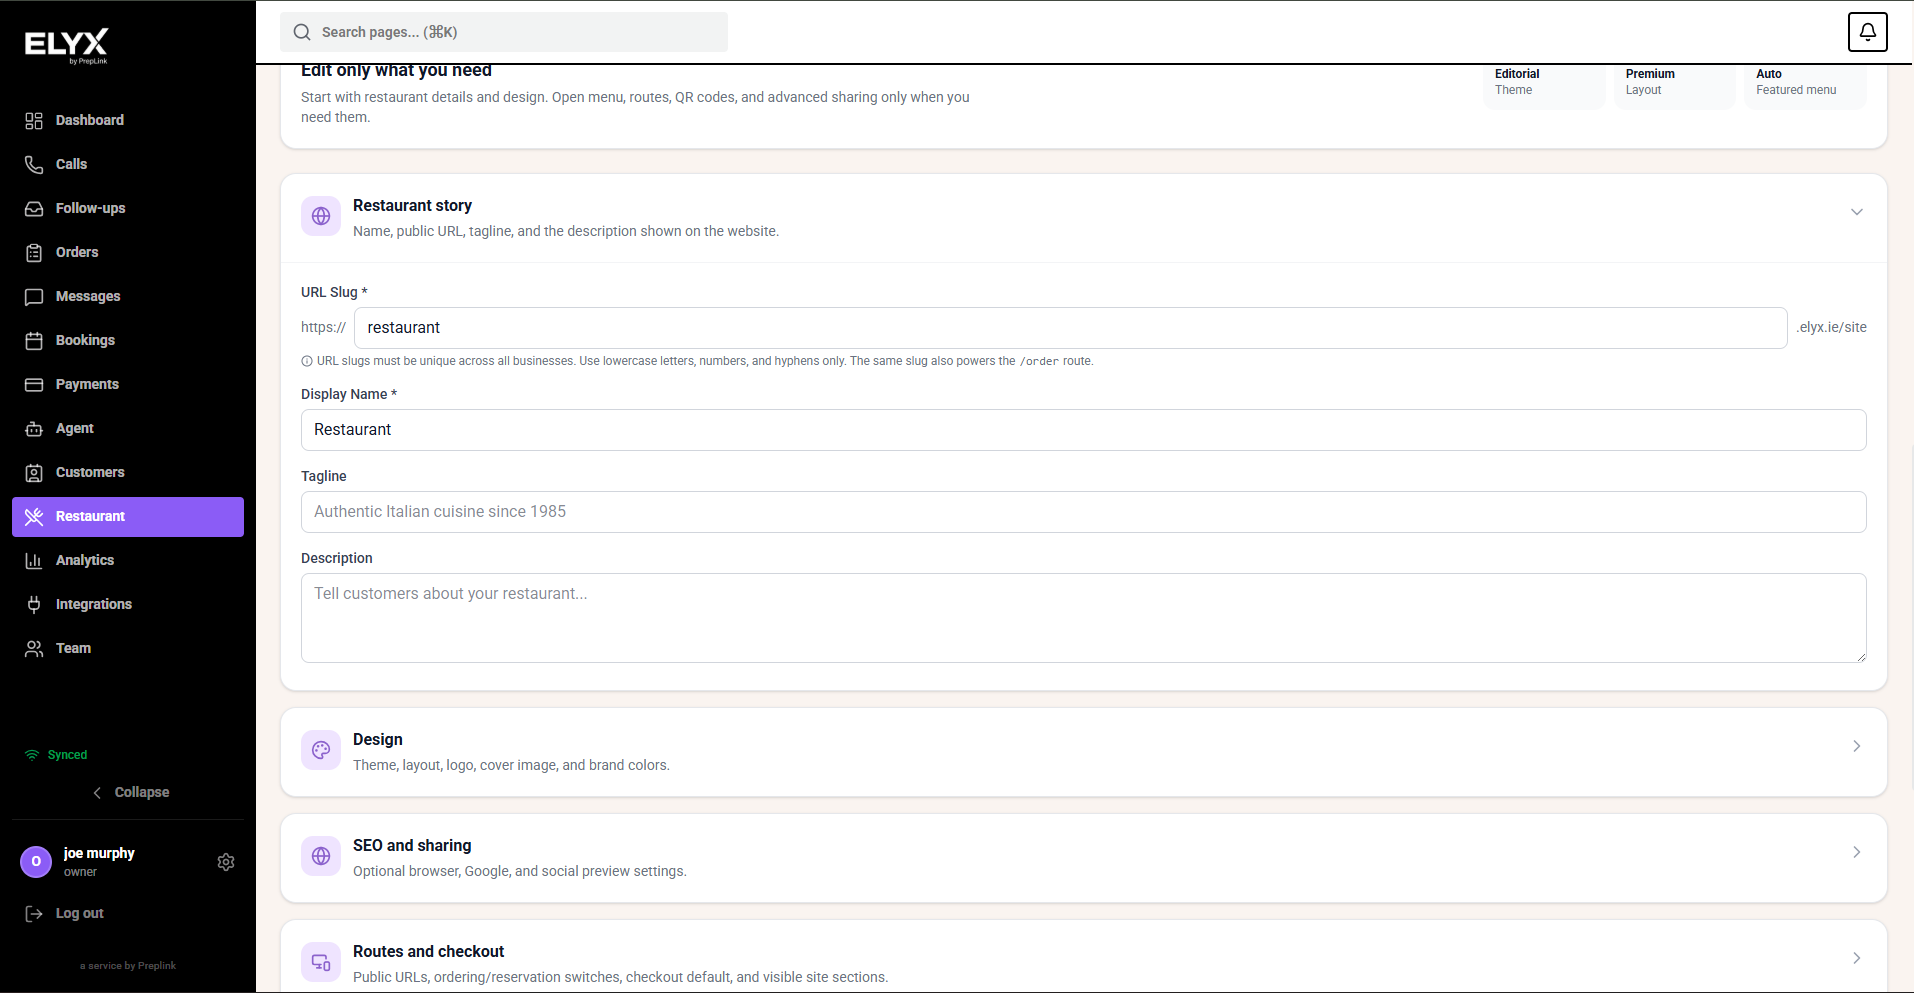
- Set the URL slug. Use lowercase letters, numbers, and hyphens only.
- Add the public display name, tagline, and description.
- Choose Save changes.
The slug powers the public site route and the order route. If the slug changes, old QR codes and shared links may need to be replaced.
Design and branding
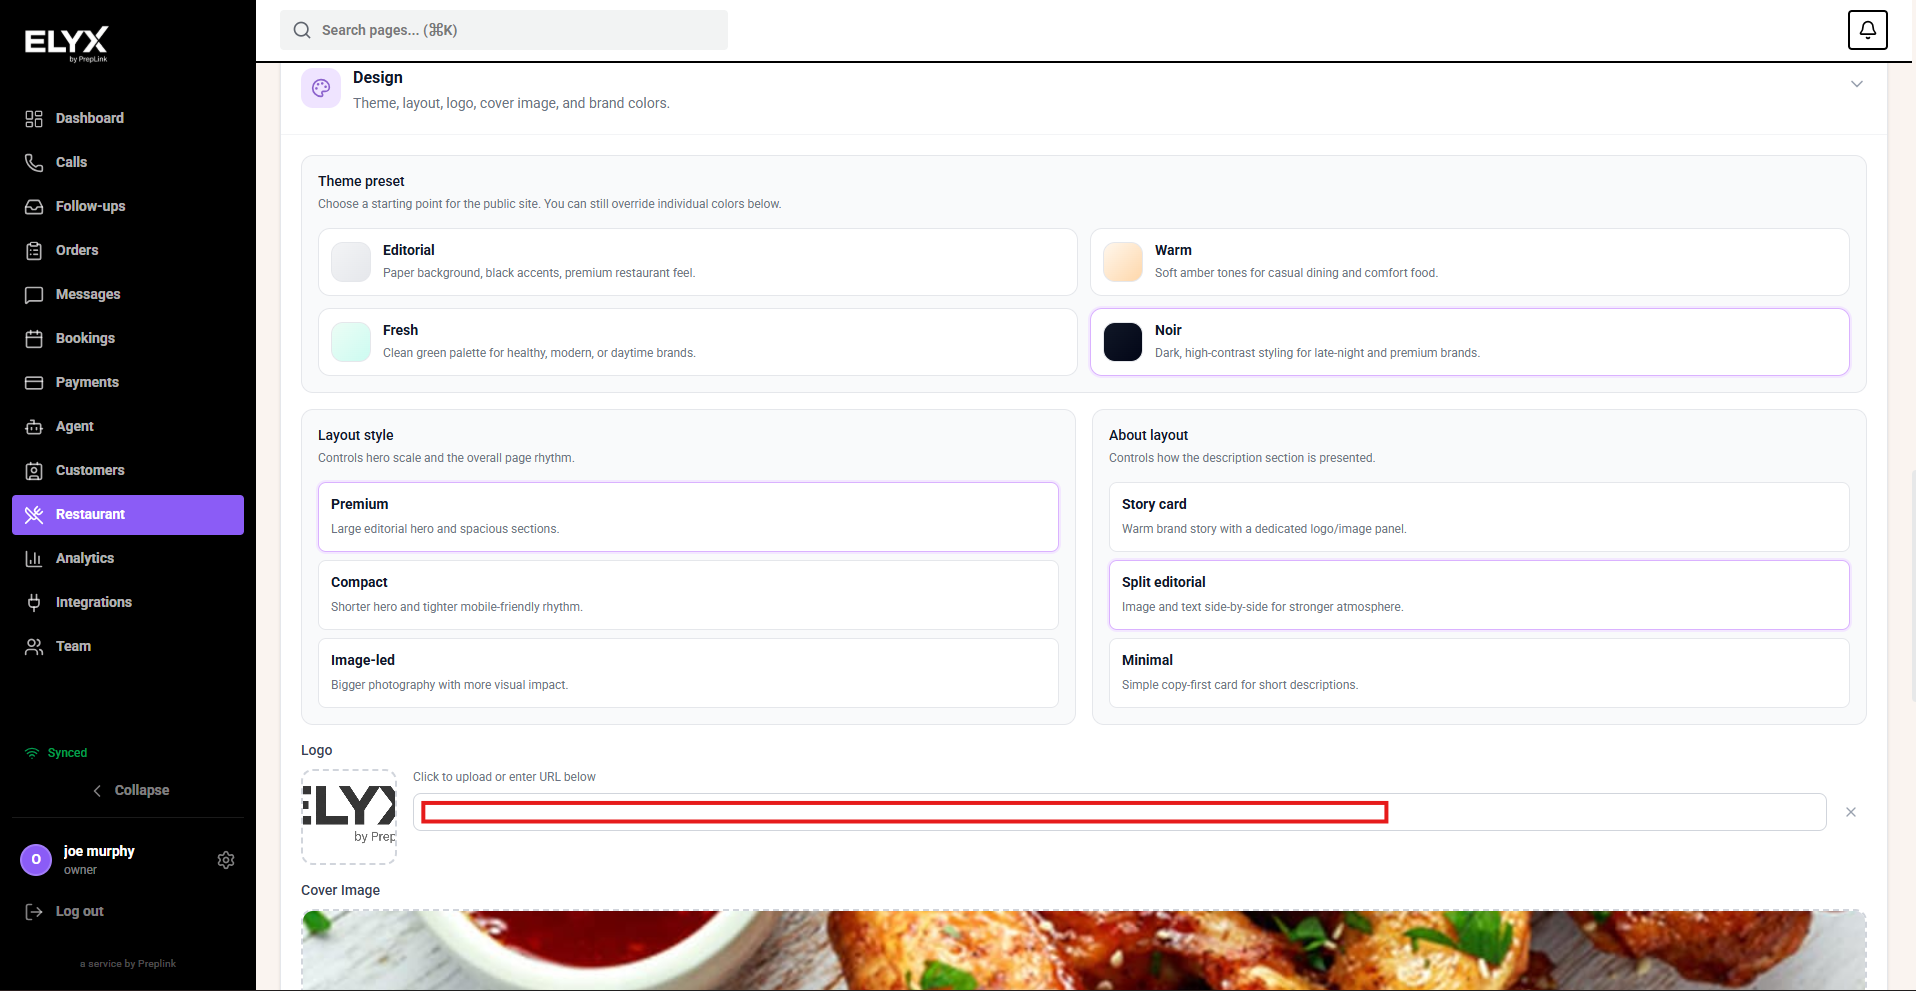
- Open Design.
- Choose a theme preset that matches the restaurant style.
- Choose the layout style and about-section layout.
- Upload a logo and cover image, or paste approved image URLs.
- Set the primary colour and background colours.
- Check the preview before saving.
- Choose Save changes.
Use real restaurant photos, not generic stock images. Guests should recognise the place they are booking.
SEO and sharing
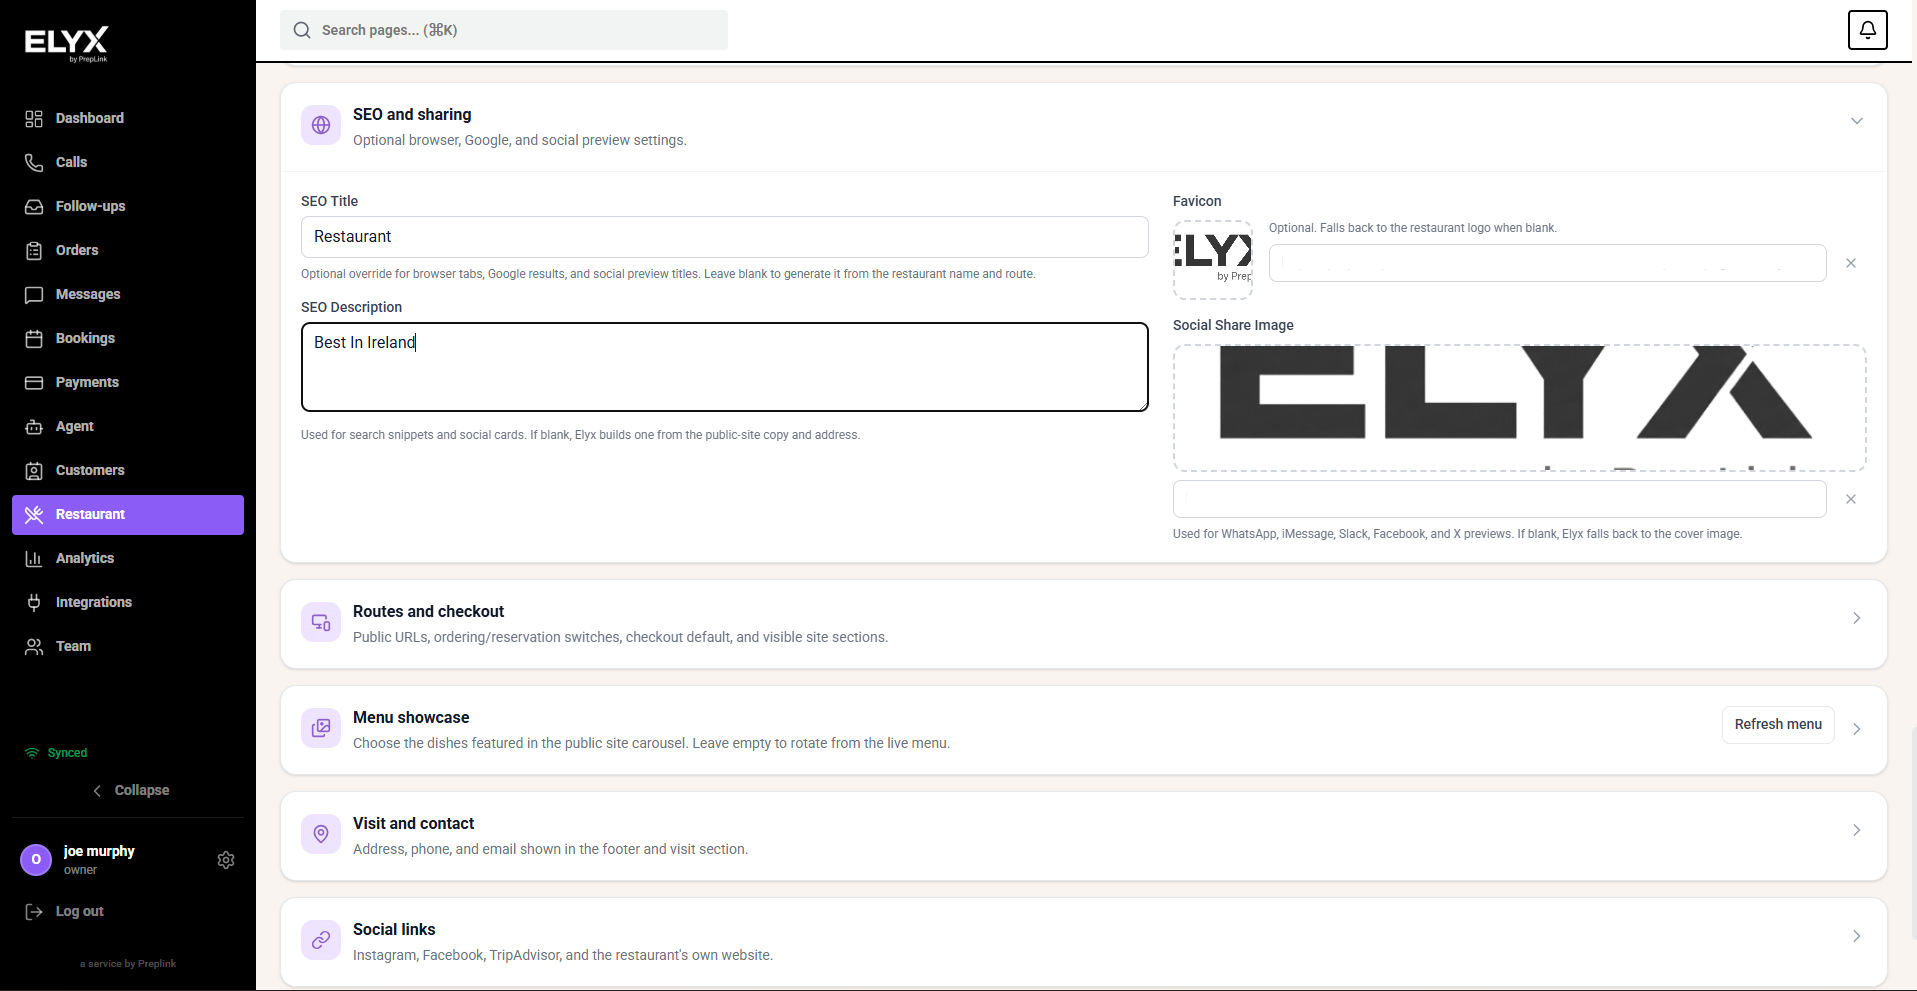
Use SEO and sharing for the title, description, favicon, and social share image that appear in browser tabs, search snippets, and link previews.
- Open SEO and sharing.
- Set a short SEO title, usually the restaurant name.
- Write a useful SEO description that tells guests what the restaurant offers.
- Add a favicon if the restaurant has one.
- Add a social share image so WhatsApp, iMessage, Facebook, Slack, and similar previews do not show a blank or cropped image.
- Choose Save changes.
Keep this customer-facing. Do not put internal notes, test wording, or staff-only contact details in SEO fields.
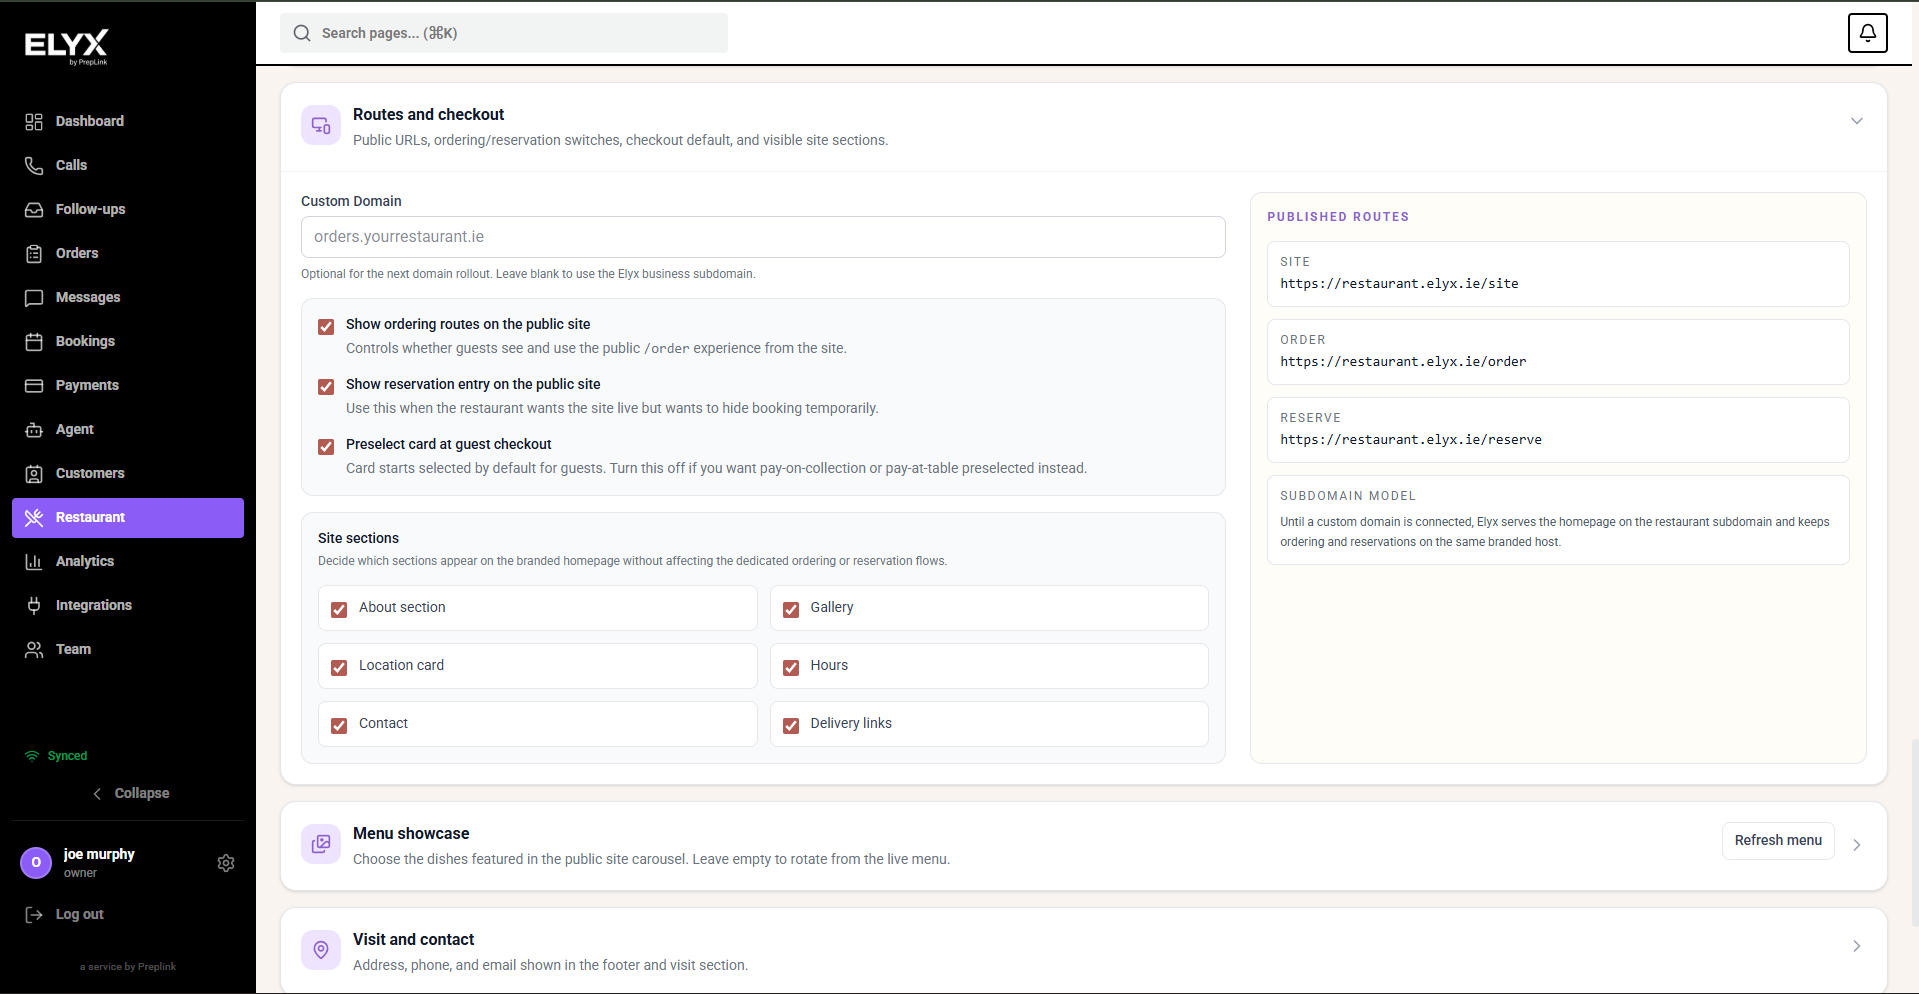
Routes and checkout
Use Routes and checkout to control the live public URLs and the parts of the guest site that are visible.
- Open Routes and checkout.
- Add a custom domain only if the domain is ready to be connected.
- Decide whether ordering and reservation routes should show on the public site.
- Decide whether card payment should be preselected at checkout.
- Turn homepage sections on or off: About, Gallery, Location, Hours, Contact, and Delivery links.
- Check the published route panel for the site, order, and reserve URLs.
- Choose Save changes.
The dedicated order and reservation routes can exist even when you hide links from the homepage. Hiding a section changes the branded homepage, not the underlying restaurant rules.
Menu showcase
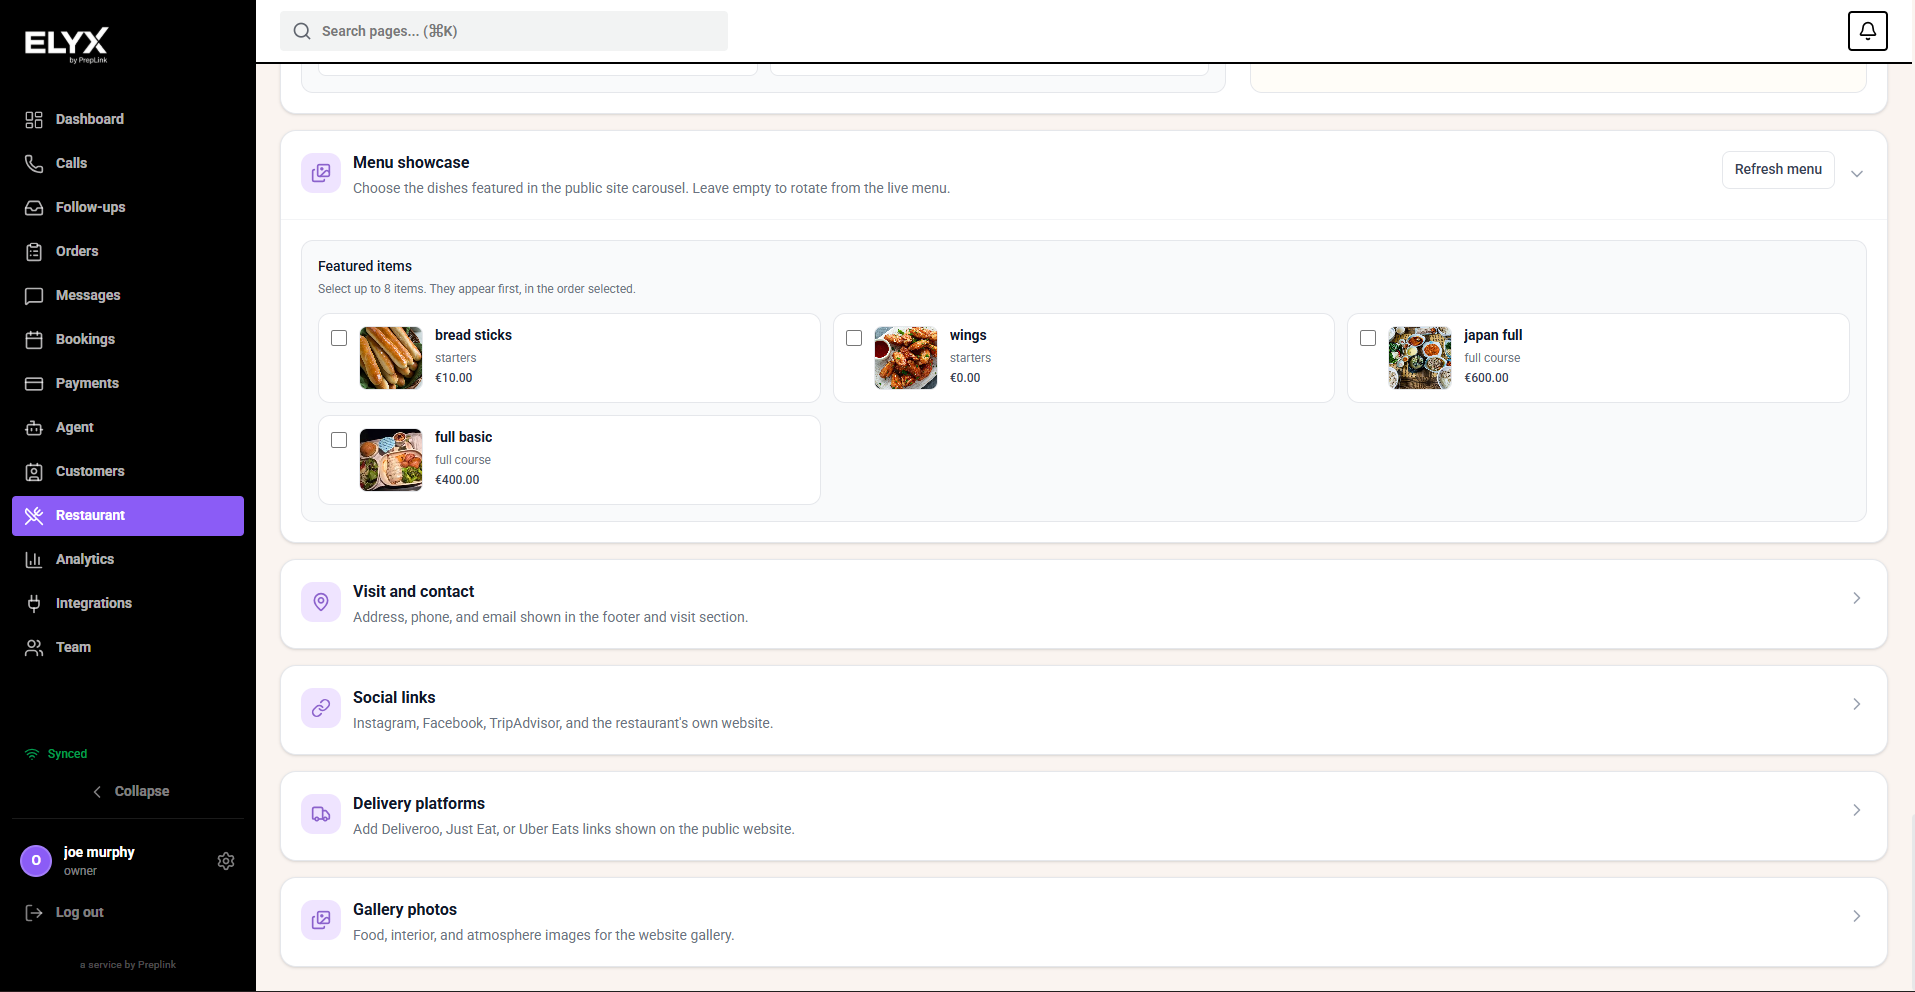
Use Menu showcase to choose the dishes shown first on the public site. The products come from Restaurant -> Menu.
- Open Menu showcase.
- Choose Refresh menu if recent menu items are not showing.
- Select up to 8 items.
- Put the strongest public-facing items first.
- Make sure each selected item has a clear name, price, category, and image.
- Choose Save changes.
If no products appear, add or activate products in Menu Management first. The showcase should not include sold-out, test, or staff-only items.
Visit and contact
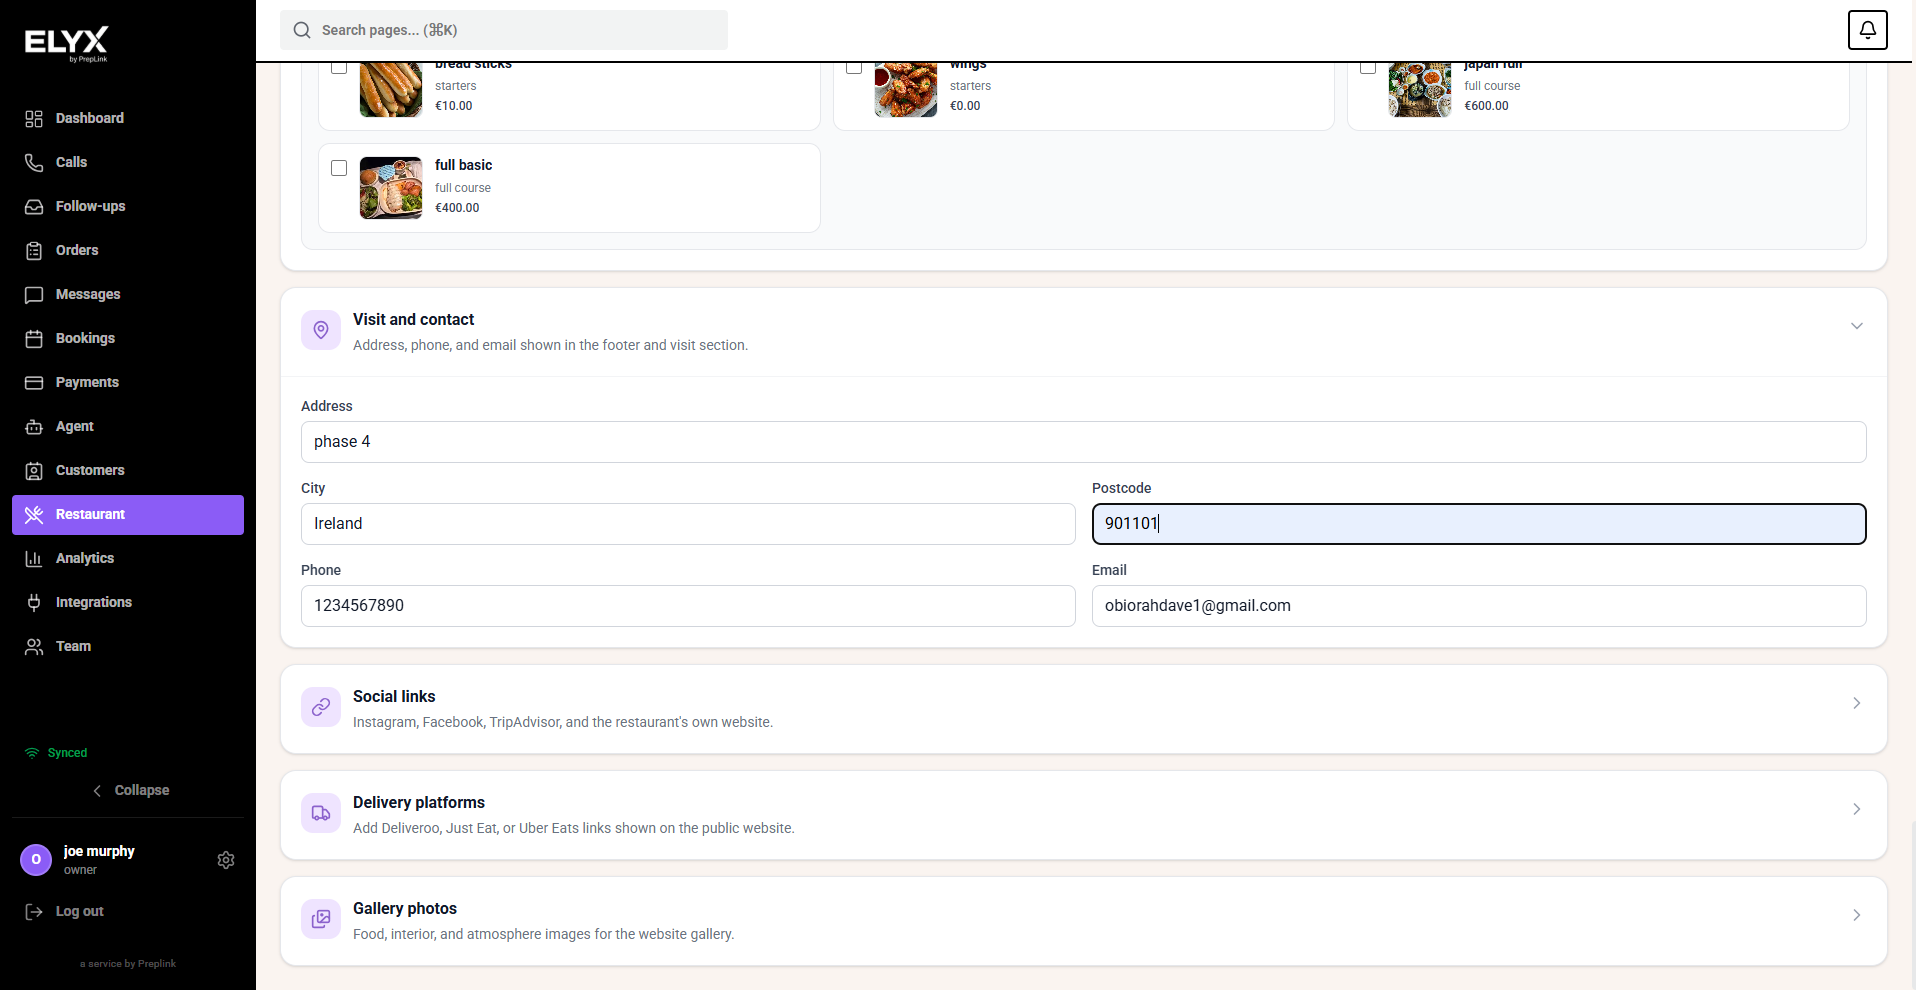
Use Visit and contact for the address, city, postcode, phone, and email shown in the footer and visit section.
- Open Visit and contact.
- Check the address and postcode carefully.
- Add the phone number guests should use.
- Add the public email address.
- Choose Save changes.
Use the customer-facing details here. If staff use a private manager number or internal email, keep those out of the public page.
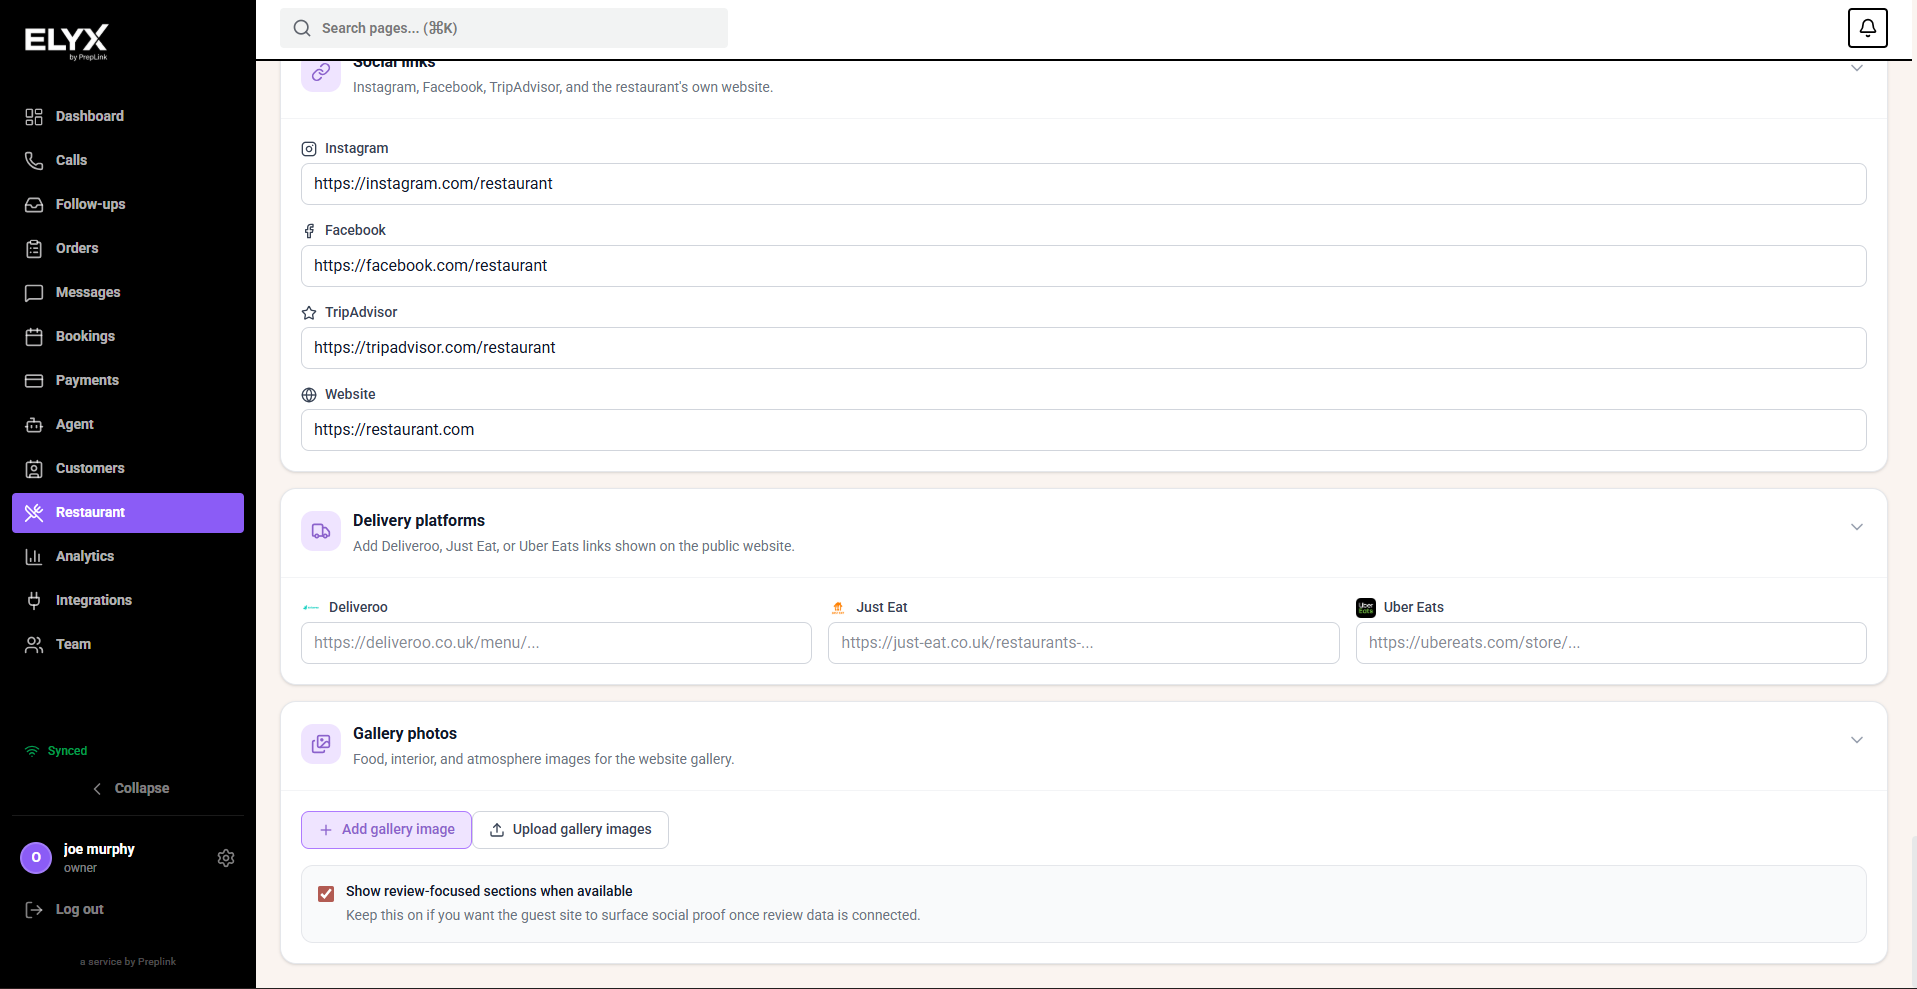
Social links
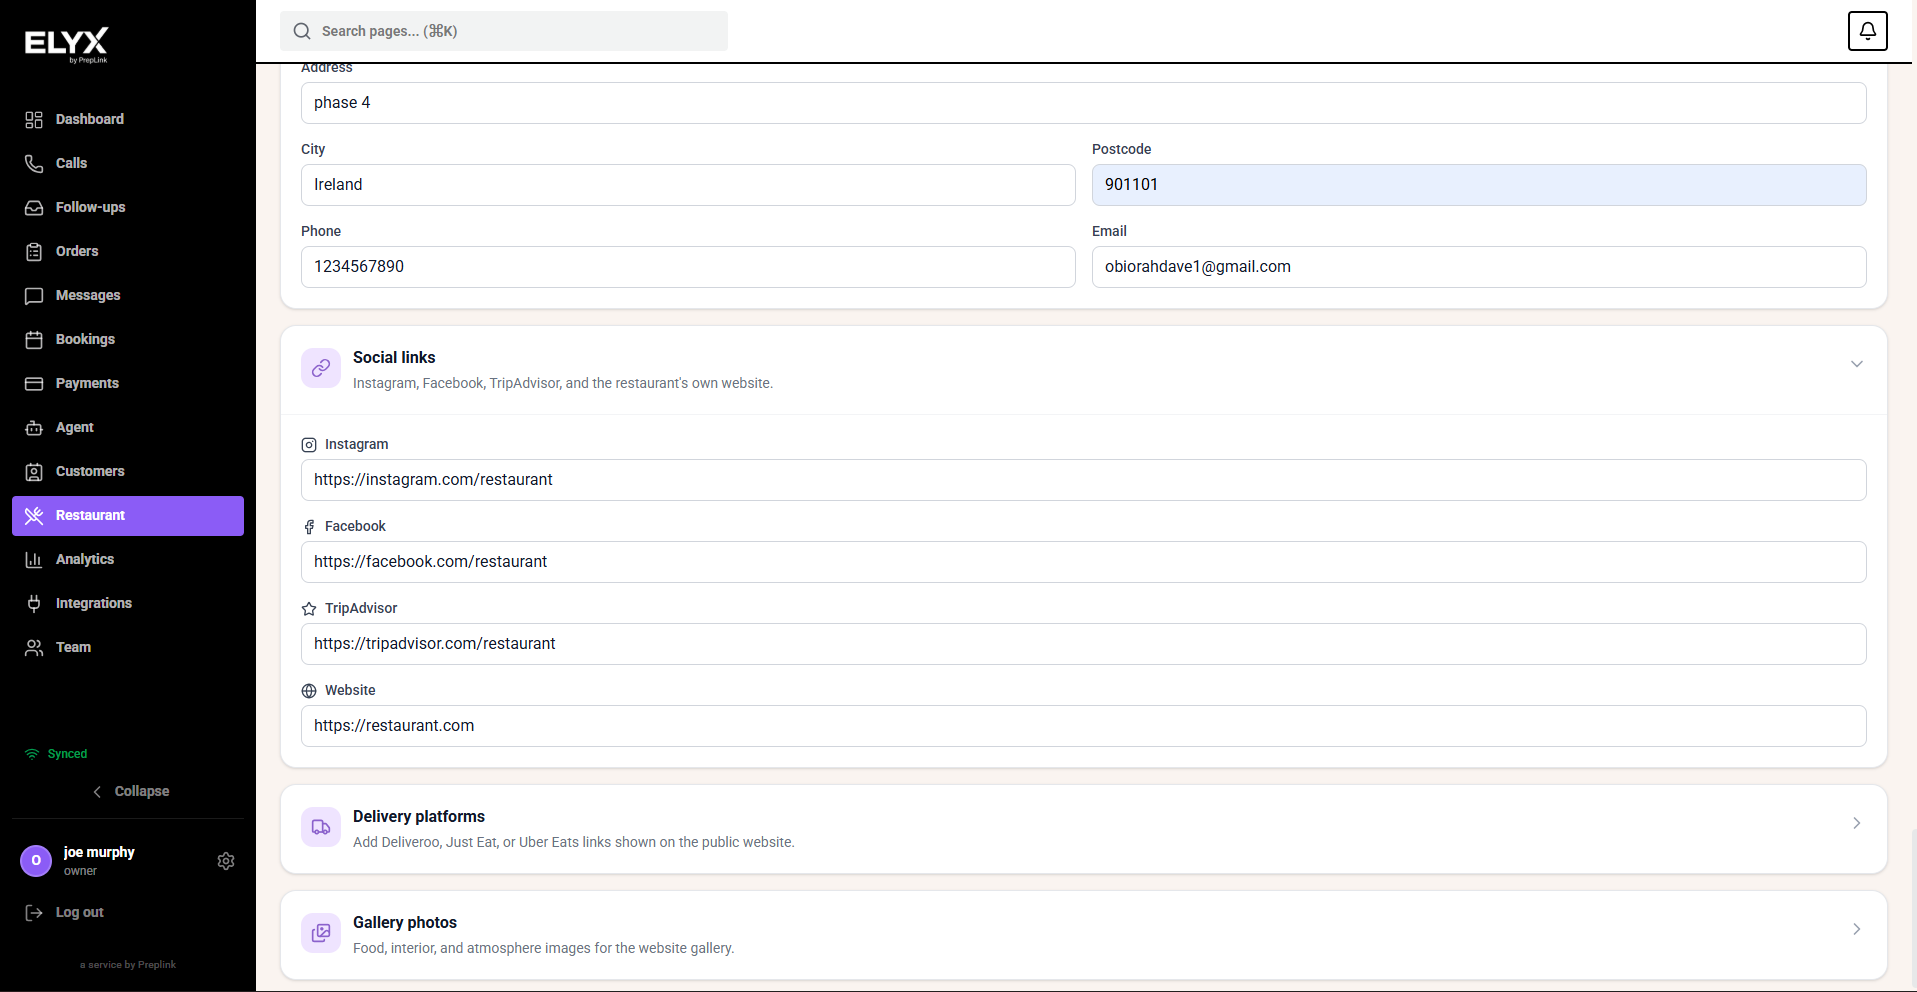
Use Social links to add Instagram, Facebook, TripAdvisor, and the restaurant’s own website.
- Open Social links.
- Paste the full URL for each public profile.
- Leave blank any profile the restaurant does not use.
- Open each link in a new tab before saving.
- Choose Save changes.
Only add live, customer-ready profiles. A broken social link makes the public page look unfinished.
Delivery platforms
Use Delivery platforms to add public links for Deliveroo, Just Eat, or Uber Eats.
- Open Delivery platforms.
- Paste the live menu or store URL for each platform the restaurant uses.
- Leave inactive platforms blank.
- Open each link and confirm it lands on the correct restaurant.
- Choose Save changes.
These links are for guests visiting the public site. They do not replace the operational delivery integration setup.
Publish the public site
After the story, design, SEO, routes, menu showcase, contact details, social links, and delivery links are ready, choose Publish. Publishing makes the public site live and activates public QR and route behaviour where the account supports it.
- Choose Save changes.
- Choose Publish.
- Open the public site route in a private browser window.
- Test the website, order route, and reservation route.
- Replace printed QR codes if the slug or route changed.
Configure guest-facing rules
Add clear wording for:
- Cancellation policy.
- No-show policy.
- Large-party policy.
- Deposit or prepayment requirements.
- Seating requests.
- Allergy process.
- Accessibility notes.
- Outdoor seating rules.
- Last seating or kitchen close.
Short, honest wording prevents phone calls and disputes later.
Test the booking flow
Before publishing:
- Try a party of two during a normal service.
- Try a party larger than your normal maximum.
- Try a closed day.
- Try a time after last seating.
- Try a fully booked period.
- Add an allergy note and check it appears on the reservation.
- Complete a test booking and confirm staff can see it.
- Cancel the test booking if needed.
Test on mobile. Most guests will use a phone.
Add the link to public channels
After testing, add the booking link to:
- Restaurant website.
- Google Business Profile.
- Instagram bio.
- Facebook page.
- Email footer.
- SMS campaigns.
- QR codes.
- Printed menus or table cards if you use them.
Use one primary booking link where possible so guests do not find old forms.
Embed on your website
If Resk provides an embed widget:
- Copy the embed code.
- Add it to your website builder’s HTML block.
- Test desktop and mobile.
- Check that the full flow fits without awkward scrolling.
- Confirm the booking appears in Resk.
If the embed is cramped on mobile, use a button linking to the full public booking page instead.
Common mistakes
- Publishing the link before testing settings and table capacity.
- Forgetting to explain deposit or cancellation rules.
- Embedding the widget in a tiny website container.
- Using old booking links on Google or social channels.
- Letting public booking offer times after the kitchen closes.
- Not checking that guest notes appear where hosts can see them.
If something goes wrong - Check Restaurant settings, Tables, Reservations, and Payments overview.
Related articles - Restaurant AI and core, Campaigns, Notifications and SMS.
Last updated: April 2026