Reservations
Quick answer - Reservations are the restaurant booking diary. Use them to create bookings, assign tables, record notes, seat guests, mark bookings complete, cancel bookings, and track no-shows. Reservations only work well when settings, service periods, and tables match real service.
Use this guide when - Hosts, front-of-house staff, managers, and anyone who answers booking questions.
Before you start - Set up Restaurant settings and Tables. Confirm that public booking and AI booking use the same availability rules as staff booking.
Open Reservations
- Choose Restaurant from the left menu.
- Choose Reservations.
- Use the day, week, or month view to review bookings.
- Use search for guest name, phone, or booking code.
- Use the status filter when you only want confirmed, seated, cancelled, or no-show bookings.
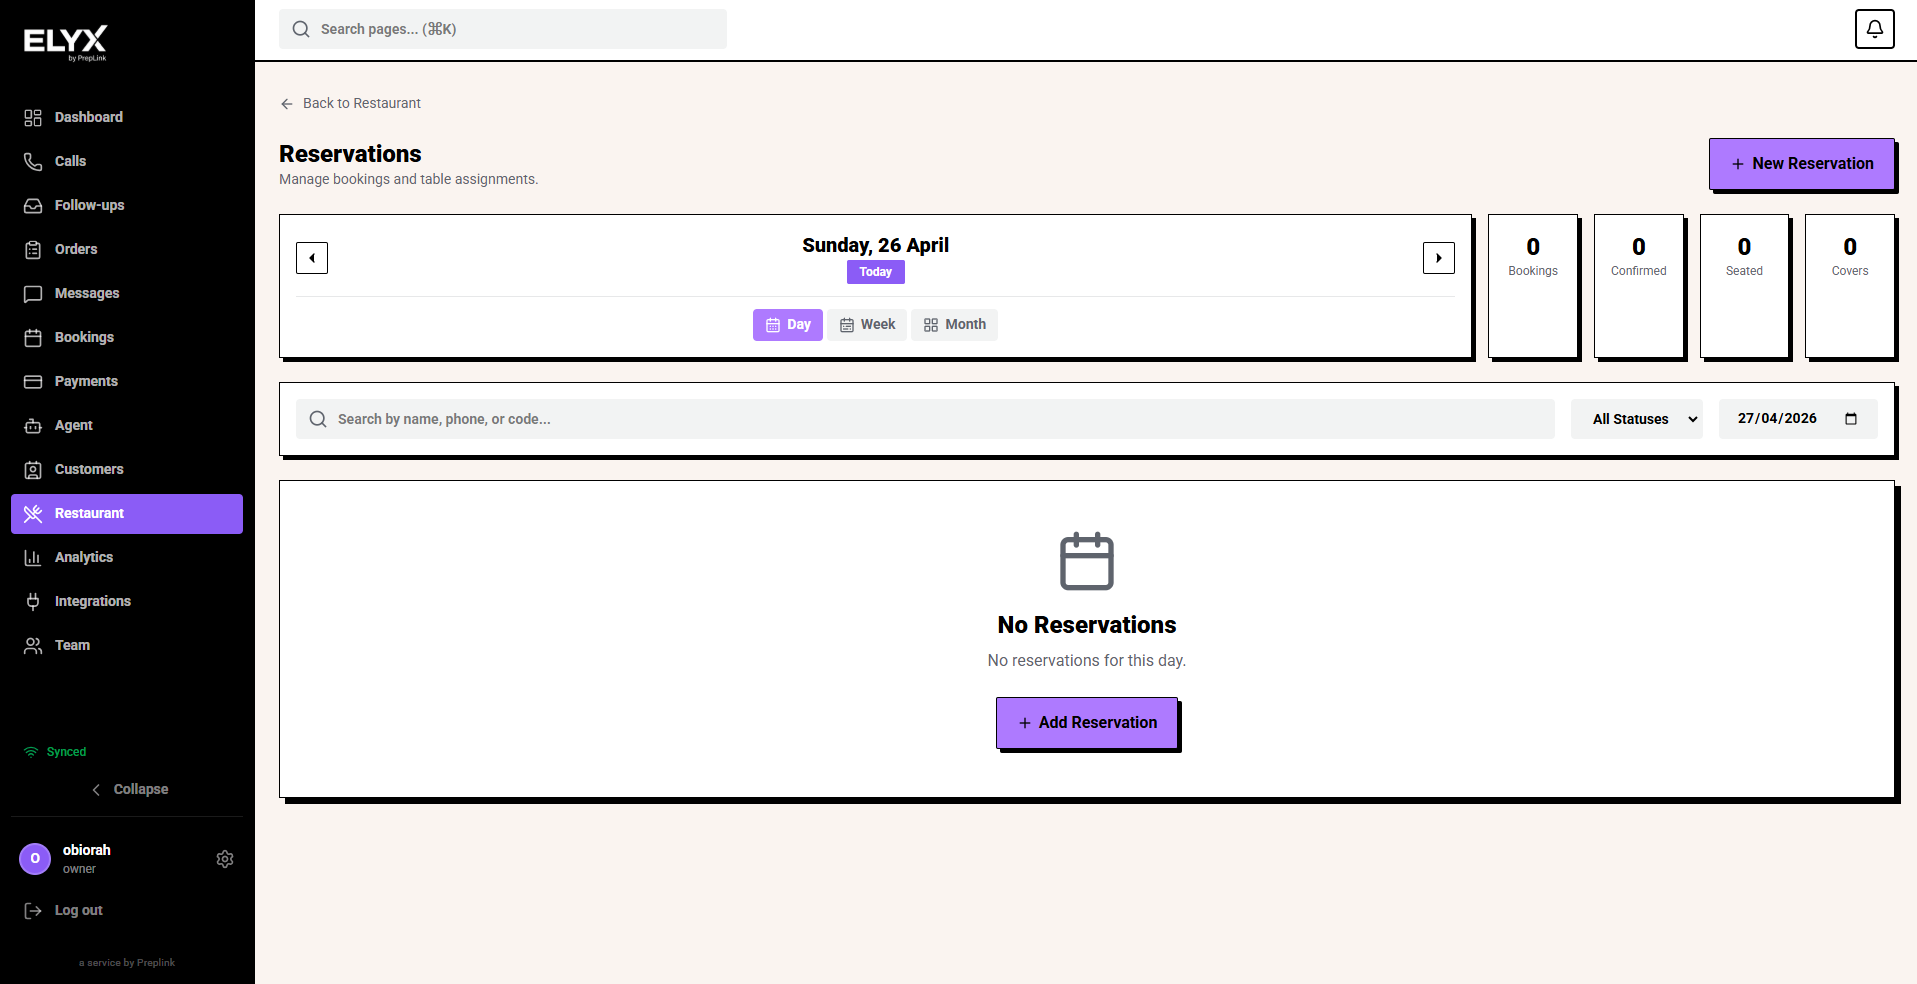
What the reservation view shows
The reservation screen usually shows a timeline, list, or calendar.
| Area | What it means |
|---|---|
| Time axis | The service day by time. |
| Table rows | Each table, zone, or section depending on your view. |
| Reservation blocks | Bookings placed at their date, time, and duration. |
| Unassigned area | Bookings that exist but are not assigned to a table yet. |
| Status labels | Pending, confirmed, seated, complete, cancelled, or no-show. |
| Notes | Allergies, occasions, seating requests, deposits, and staff context. |
Use the screen as the main booking record during service. If the floor and the reservation screen disagree, update the reservation screen.
Reservation statuses
Exact labels can vary, but most restaurants use a flow like this:
| Status | Use it when |
|---|---|
| Pending | The booking needs confirmation or staff review. |
| Confirmed | The booking is accepted and expected. |
| Seated | The guest has arrived and is at the table. |
| Complete | The guest has left and the table is free for later use. |
| Cancelled | The guest or restaurant cancelled before arrival. |
| No-show | The guest did not arrive and did not cancel. |
Train staff to update statuses in real time. Reports and future availability depend on it.
Create a reservation manually
- Open Restaurant.
- Choose Reservations.
- Choose New reservation.
- Enter the guest name.
- Add the guest phone number and email if you collect it.
- Select the date and time.
- Enter the party size.
- Confirm or adjust the duration.
- Assign a table or leave it unassigned if a manager will place it later.
- Add notes for allergies, access needs, high chairs, occasions, deposits, or seating requests.
- Choose Save or Create.
After saving, check the reservation appears in the correct time slot.
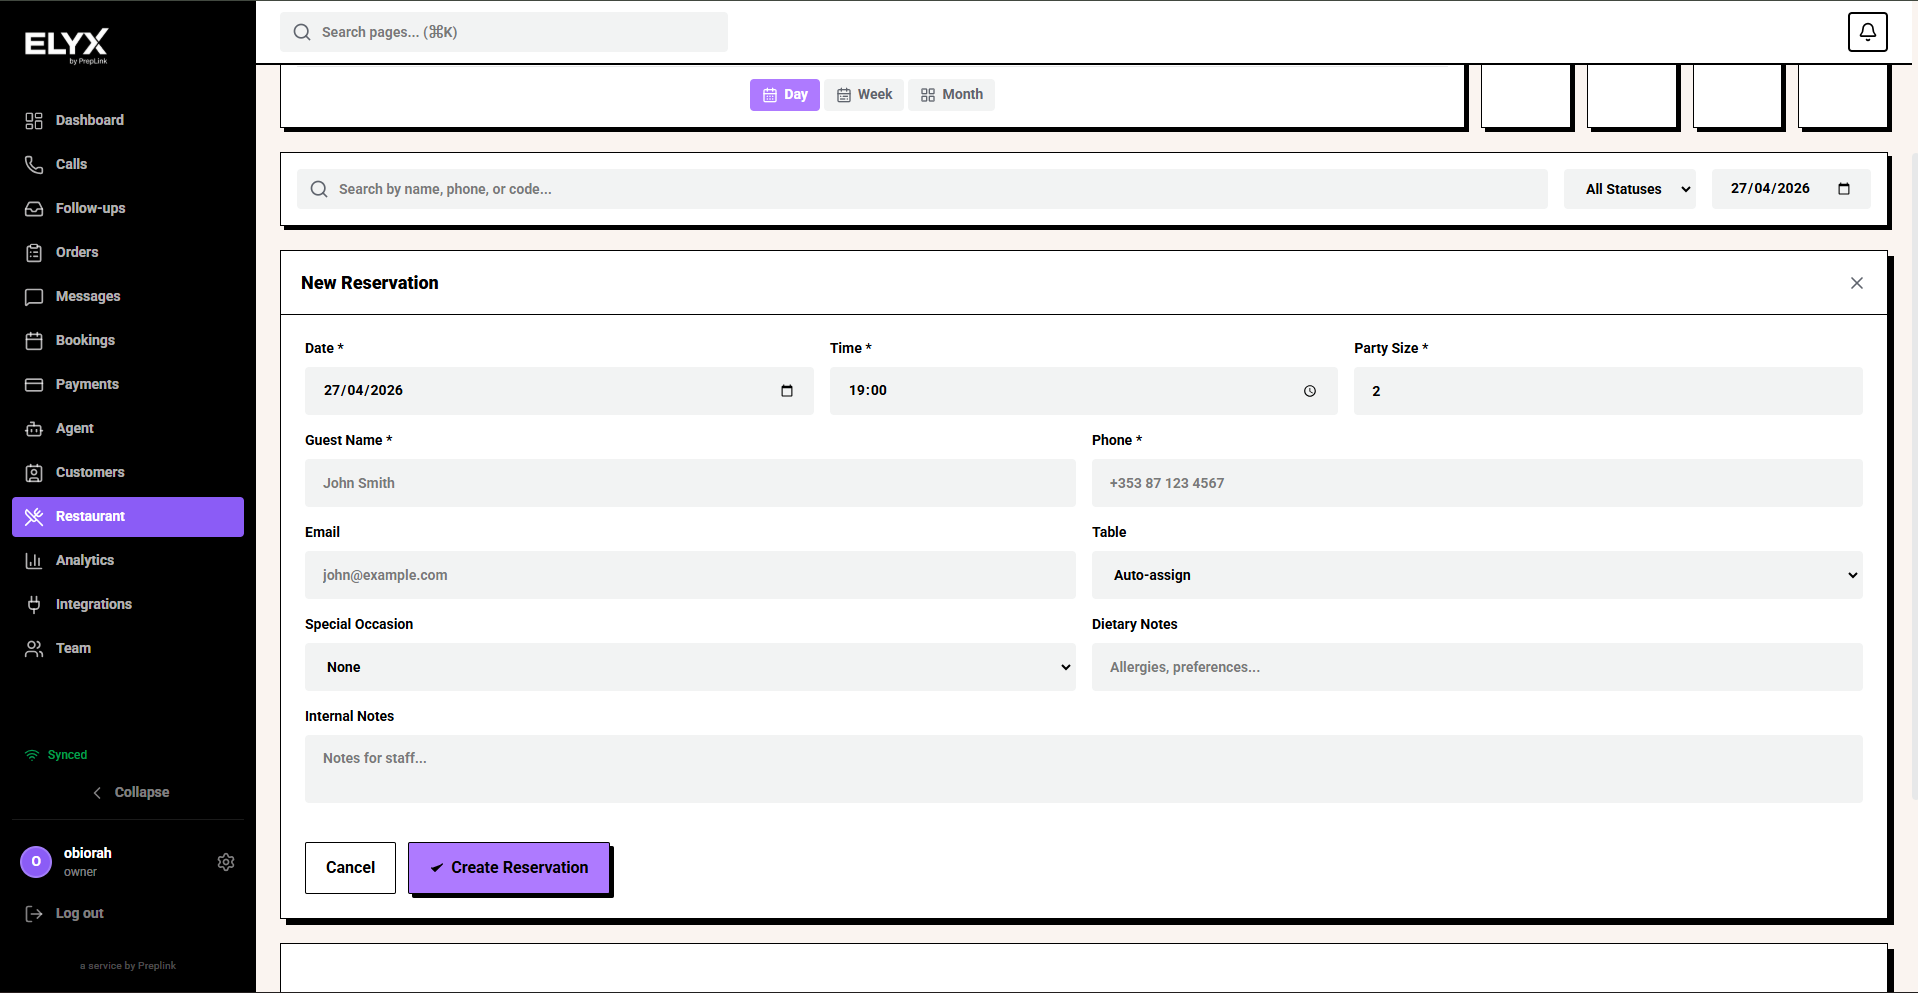
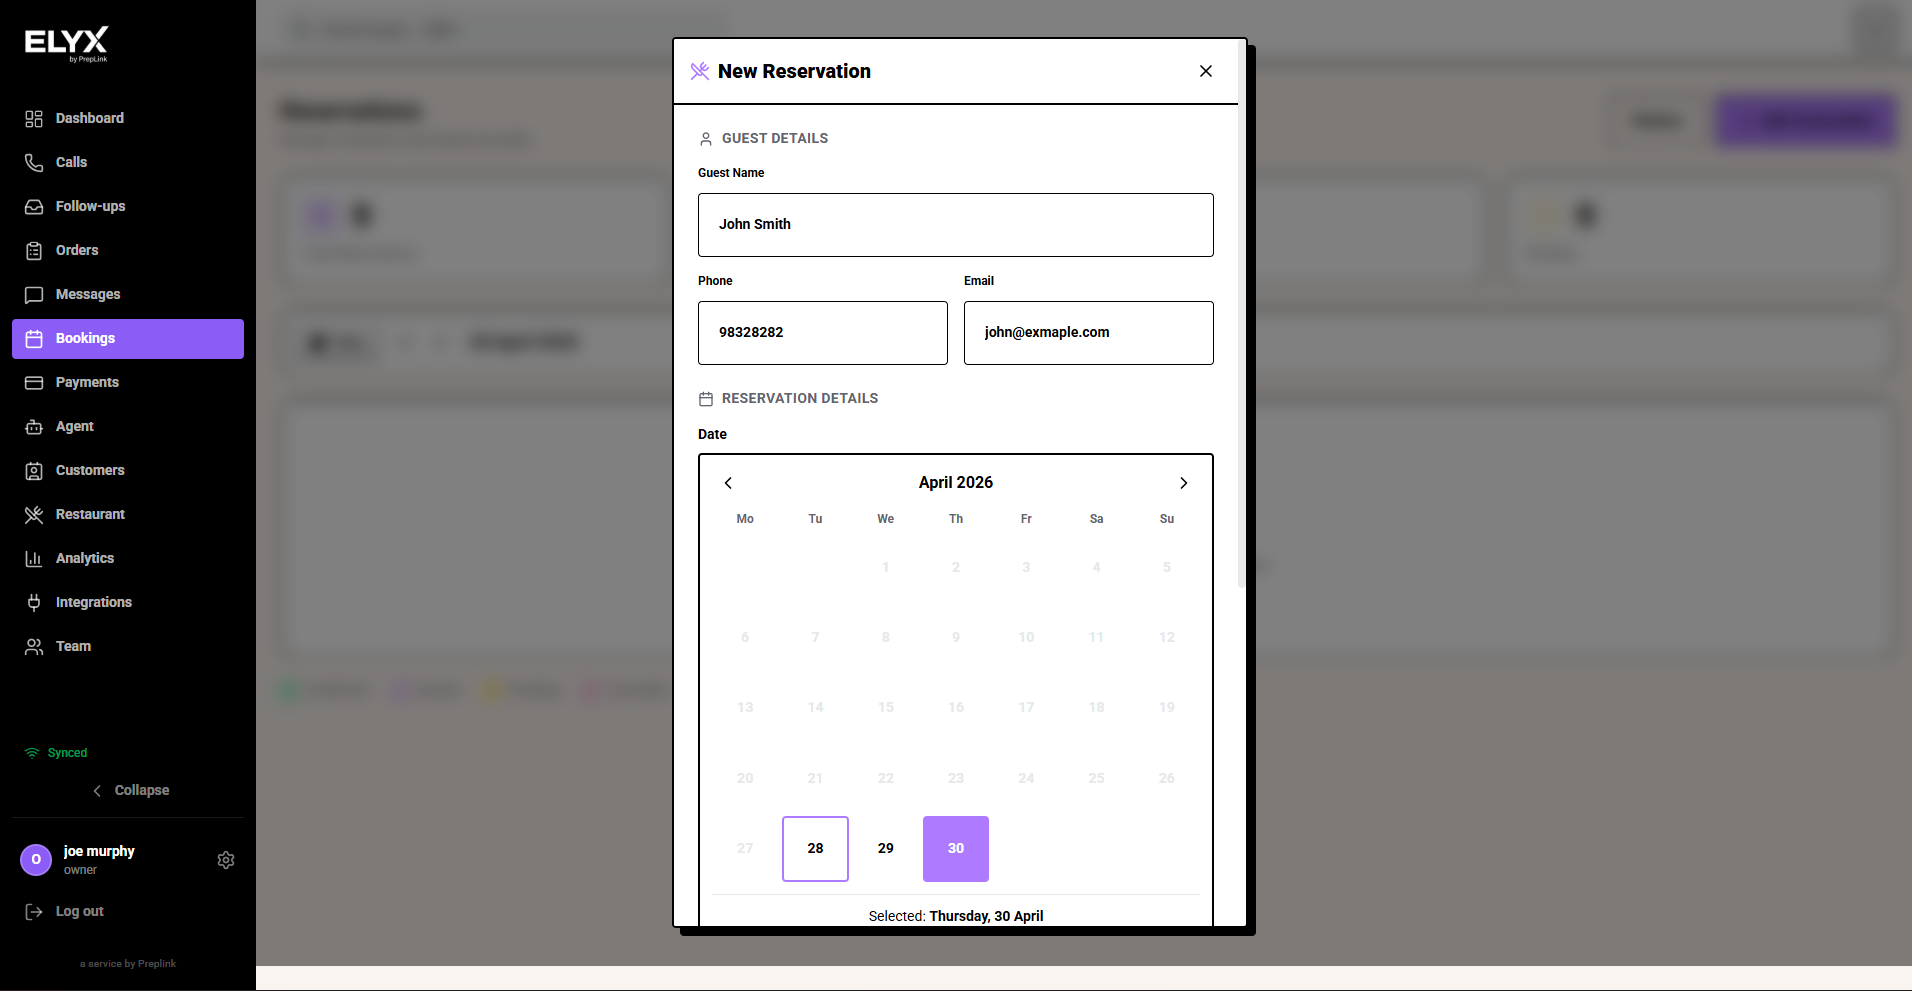
On smaller screens, the reservation form may appear as a narrow modal. The same fields still matter: guest details, date, time, party size, table, dietary notes, and internal notes.
Assign or move a table
- Open the reservation.
- Choose Edit, Assign table, or drag the booking if the timeline supports it.
- Select the new table.
- Check that the table can fit the party size.
- Choose Save.
If you move a table during service, tell the host or server responsible for that section.
Change a booking
Use edit when a guest changes time, party size, date, or contact details.
- Search for the guest or open the booking from the timeline.
- Choose Edit.
- Change the date, time, party size, duration, table, or notes.
- Check for availability warnings.
- Choose Save.
- Confirm the change with the guest if your workflow requires it.
Note: A party-size change can affect both table assignment and duration. Do not only update the note.
Seat a guest
- Find the reservation when the guest arrives.
- Confirm the party size and any notes.
- Assign or confirm the table.
- Mark the booking Seated.
- Tell the server about allergies, special occasions, VIP status, or unusual requests.
When the table leaves, mark the booking Complete so the table can be reused.
Cancel or mark no-show
Use honest statuses so reports are useful.
- Open the reservation.
- Choose Cancel or Mark no-show.
- Add a reason if the screen asks for one.
- Choose Confirm.
Use Cancelled when the booking will not happen and the restaurant or guest knows in advance. Use No-show when the guest simply did not arrive.
Handle large parties
Large parties need extra care because they affect capacity, prep, deposits, and staffing.
- Check the party size against your rules.
- Confirm deposit or prepayment policy if you use one.
- Add notes for menu choice, allergies, occasion, and seating layout.
- Assign the table or room early.
- Confirm who on staff owns the booking.
- Review the booking on the day of service.
For parties above your normal maximum, use staff review rather than automatic confirmation.
How AI and public booking use reservations
The AI agent and public booking page can create reservations only if the underlying setup is accurate.
Check these if guests cannot book:
- Opening hours and service periods.
- Reservation duration.
- Minimum and maximum party size.
- Active tables and table capacity.
- Public booking rules.
- Deposit or confirmation rules.
If the AI says a slot is unavailable but staff think it is available, compare the reservation timeline with settings and table capacity.
Common mistakes
- Leaving bookings unassigned until the guest arrives.
- Forgetting to mark seated or complete.
- Updating guest requests in notes but not changing party size or table.
- Treating cancelled and no-show as the same thing.
- Allowing AI or public booking before settings and tables are tested.
- Not recording allergies or access needs where staff will see them.
If something goes wrong - See Restaurant FAQ, Troubleshooting, and Availability and business hours.
Related articles - Tables, Waitlist, Public booking page, Restaurant AI and core.
Last updated: April 2026